In case you're feeling nostalgic for beer-related television after the questionably-permanent end of Brewmasters, or if you're dying to add just one more reality-tv show to your addiction, check out BYOB TV over on kofytv.com. The content is homebrewing-related, but entirely relevant to non-homebrewing beer fans as well. And, it's simply entertaining. It's in a reality TV format, meaning there are teams that face a variety of challenges and, toward the end of each episode, potential elimination from the show. At the end of the season, the team left standing will receive a trip to the Pilsner Urquell brewery in Plzen. Not too shabby!
If you've ever listened to Brewing Network's Sunday Session, you'll likely recognize host Justin Crossley and "Director of Difficulty" JP. The first episode starts out with a quiz show style game, where competing teams answer questions about beer, perform taste tests, and guess hop varieties based on aroma. The teams then move on to timed challenges hooking up brewing equipment and finish up with a relay race involving mugs of beer and spent grain. Two of the eight teams were eliminated, with the remaining six going on to episode #2.
Episode #2 kicks off with the six remaining teams making different batches of beer, including a squash-sage beer, one with meyer lemons, and an oatmeal-raisin-cookie beer. But there's a twist that gets introduced, making the challenge even more challenge-y (and you have to watch the episode to see what it is). A judging panel chose to move five of the six teams on to episode #3, sending one team home.
And, finally, the most recent episode's challenge was to build an all-grain homebrew setup from junk. As with most reality shows, a bit of drama occurs within the first ten minutes but all was made right with a bit of compromise. This ended up being my favorite episode; I loved the sprinkler attached to the inside of the cooler-MLT lid for sparging, as well as the terra cotta pot as a false bottom.
Only four teams remain after this episode, and the next one available (aired May 14th but not yet online) involves the teams having to clone a Lagunitas brew. The show's well-made and engaging, and I laughed more than a few times. Happy viewing!
Showing posts with label Homebrewing. Show all posts
Sunday, May 15, 2011
Monday, May 2, 2011
Big Brew Day
National Homebrew Day is this coming Saturday (May 7th), which means that homebrew clubs nationwide will be hosting Big Brew events. Big Brew is an event where homebrewers gather to make homebrew, share knowledge, answer questions, share love for the hobby, and... drink beer. The American Homebrewers Association (AHA) publishes recipes each year, and this year's are an 1800s style East India Pale Ale, a Wit, and a Robust Porter.
Basically, you show up and talk beer & homebrew while brewing, helping brew, or watching someone else brew. If you're interested in the hobby but have no idea where to start, this is a perfect opportunity to get answers. We've got a few Big Brew days in our neck of the woods put on by a few clubs. Be sure you're there by noon (if not sooner), when a nationwide toast to homebrewing will take place.
- The KC Bier Meisters will, as in years past, host Big Brew in the area behind Bacchus & Barleycorn. Festivities start at 10. More info is on the KCBM website.
- ZZ Hops' Big Brew day will be in Lee's Summit, also starting at 10am. See their Facebook page for when, where, and contact info.
- Jayhops has contact information on their Facebook page as well, if you'd like to attend.
Cheers! And happy homebrewing.
Friday, April 29, 2011
Making Mead - Part Five
So here we are, the final post in my little series on meadmaking. I'm not a pro, I haven't won meadmaker of the year, and I won't claim to make the best meads I've ever had. But, despite that, I've learned a lot of information over the past 1.5 years that has vastly improved our meads - and one is going to compete this June in the AHA National Homebrew Competition. I've compiled a bunch of resources here to help get you on your way, including where you can find good examples of commercial meads.
Honey
You can buy honey at any of our local farmers’ markets, but you’re going to find that wildflower & clover are the two types of honey available locally. For varietals such as tupelo, basswood, mesquite, or orange blossom, you’re going to need to find a non-local source. (That said, when Trader Joe’s finally opens up here, you’ll be able to get Mesquite honey there.) Some of the honey providers I’ve used, and that others recommend, are:
Tools
I’ve mentioned a few key tools in these posts, but here are the links to them again. Obviously, the standard fermenter, blowoff assembly, hydrometer/refractometer, and other standard brewing tools apply here too.
As I mentioned a few days ago, everyone finds their own approach. What I’ve laid out here is the method we’ve figured out by gathering information from the interwebs, attending NHC, talking to other meadmakers, reading books, and experience. I recommend checking out some other mead resources to see what others are doing and get a different perspective – as well as inspiration. Here are just a few -
Advanced Information on Mead
I'm not even going to try to describe the plethora of information on the BJCP mead page, but please check it out. There is so much good information there, it's a necessary resource for any meadmaker. From information on varietal honey to punching down fruit caps in melomels, to styles, to troubleshooting, you'd be hard-pressed not to find what you're looking for here. This is an incredible source of information on making mead.
Commercial Meads
We can get a handful of meads here in Kansas & Missouri, and I've found the widest selection, all on the Missouri side, at Gomer's Midtown, Royal on 103rd, and Lukas in Martin City. They're typically located with the port & sake, but you might have to ask if you don’t see it. Some brands you're bound to see:
There are some fantastic meaderies cropping up all over the country, though. Some of the greats include
I'm sure I'm forgetting some, but that should get you started.
I haven’t really talked about it, but Polish mead is a somewhat different beast and one I have yet to see here in the KC metro. I know you can find some in St Louis at the Wine & Cheese Place; the traditional bottles are pretty easy to spot. Polish mead typically comes in four strengths: 2:1, 1:1, 1:2, and a 1:3 honey:water ratio. Most are aged on wood for 1-4 years (some are aged up to 25 years), and contain fruit or herbs. The resulting product is a sweet but smooth and rich beverage that is notably high in alcohol. It’s definitely worth trying once (or more).
You can order from many of the meaderies directly, which is probably going to be your best bet since online wine retailers really only tend to carry Chaucer's. Since KS state law doesn't allow direct shipment of alcohol to households, you’ll need to have it sent to a location in Missouri (my house, for example).
I hope you found this information helpful and inspiring. If you’re interested in meeting and talking to other meadmakers, there are a few homebrewing clubs in the KC metro area with members who make mead: KC Bier Meisters, Lawrence Brewers Guild, ZZ Hops, and Jayhops.
Thanks for reading!
Reference -
part one
part two
part three
part four
Honey
| 55 pounds of sweet goodness |
- Millers Honey
- Draper Bee
- Bee Folks
- Northern Brewer
- To find other honey retailers, you can use the National Honey Board's Honey Locator
Tools
I’ve mentioned a few key tools in these posts, but here are the links to them again. Obviously, the standard fermenter, blowoff assembly, hydrometer/refractometer, and other standard brewing tools apply here too.
- Lees Stirrer: In addition to your fermenter, you will definitely want to pick up a lees stirrer to mix & degas your must.
- Postal Scale: Measuring out your honey is made easy with a postal scale; I bought ours on Amazon and am completely happy with it. I also use this when shipping off beers to homebrew competitions. Sign up for a free account on UPS or FedEx’s website, and you can print out shipping labels after entering destination & weight information online. All you have to do is drop off the package with your label in an affixed pouch; no waiting in line.
- Gram scale: I also recommend getting one of these to measure out your nutrients and yeast. It’s also really handy for measuring hops.
- pH Strips or Meter: pH is so important to meadmaking, you really need to measure it so that it can be adjusted as necessary. The most economical approach is with pH strips, but I recommend investing in a pH meter. You’ll need to calibrate the meter on each mead day (assuming you’re making it less frequently than every few days), so pick up some solution at the same time. Don’t forget the storage solution as well, which will keep the little probe from drying out.
- Mead Calculator: This is such a handy tool for helping you figure out how much honey, water, and other fermentable ingredients you'll need for your batch.
As I mentioned a few days ago, everyone finds their own approach. What I’ve laid out here is the method we’ve figured out by gathering information from the interwebs, attending NHC, talking to other meadmakers, reading books, and experience. I recommend checking out some other mead resources to see what others are doing and get a different perspective – as well as inspiration. Here are just a few -
- homebrewtalk.com
- gotmead.com
- meadmaking subreddit
- mead made complicated
- Ken Schramm’s book, The Compleat Meadmaker
Advanced Information on Mead
I'm not even going to try to describe the plethora of information on the BJCP mead page, but please check it out. There is so much good information there, it's a necessary resource for any meadmaker. From information on varietal honey to punching down fruit caps in melomels, to styles, to troubleshooting, you'd be hard-pressed not to find what you're looking for here. This is an incredible source of information on making mead.
Commercial Meads
| Winner of a well-deserved gold medal |
- Redstone (CO) - makers of some of the best commercial mead I've had. They make a hopped mead.
- Chaucer's (CA)
- Pirtle (MO) - I highly recommend their blueberry & effervescent meads. The effervescent just won a gold medal for traditional sweet mead at Mazer Cup! Typically stocked in the Missouri Wine section.
- Honeywood (OR)
- Lurgashall (England)
- Bunratty (Ireland)
- Makana (S Africa) - they make a great bird's eye chili mead
There are some fantastic meaderies cropping up all over the country, though. Some of the greats include
- B Nektar (incredible meads out of IN)
- Rabbits Foot (CA; they make several braggots)
- Heidrun (CA; fantastic sparkling meads using méthode champenoise)
- New Day (IL)
- White Winter (WI; one of my favorites)
- Mountain Meadows (CA)
I'm sure I'm forgetting some, but that should get you started.
I haven’t really talked about it, but Polish mead is a somewhat different beast and one I have yet to see here in the KC metro. I know you can find some in St Louis at the Wine & Cheese Place; the traditional bottles are pretty easy to spot. Polish mead typically comes in four strengths: 2:1, 1:1, 1:2, and a 1:3 honey:water ratio. Most are aged on wood for 1-4 years (some are aged up to 25 years), and contain fruit or herbs. The resulting product is a sweet but smooth and rich beverage that is notably high in alcohol. It’s definitely worth trying once (or more).
You can order from many of the meaderies directly, which is probably going to be your best bet since online wine retailers really only tend to carry Chaucer's. Since KS state law doesn't allow direct shipment of alcohol to households, you’ll need to have it sent to a location in Missouri (my house, for example).
I hope you found this information helpful and inspiring. If you’re interested in meeting and talking to other meadmakers, there are a few homebrewing clubs in the KC metro area with members who make mead: KC Bier Meisters, Lawrence Brewers Guild, ZZ Hops, and Jayhops.
Thanks for reading!
Reference -
part one
part two
part three
part four
Wednesday, April 27, 2011
Making Mead - Part Four
In the past three posts, we've gone through getting ingredients, mixing them, and going through fermentation & staggered nutrient additions + degassing. Mead fermentation should take about 3 weeks, give or take. We usually give it a month or so to get to our final gravity and let as much yeast fall out as possible. Once fermentation is done, there are a few things you can do:
- Make it sweeter
- Make it more acidic
- Make it more tannic
- Modify the flavor with additional ingredients
- Clarify the mead
Backsweetening
Unlike beer wort, honey is pretty much completely fermentable and your mead may end up a bit dry. Unless you arrest fermentation before it finishes by racking off the yeast and adding stabilizers (an approach I don't trust at all), you'll probably want to add back a little honey to bring out some of the original honey character as well as increase the mouthfeel. If you add more honey to your brand new mead, the yeast are just going to consume it. So, you need to add stabilizers before doing anything else.
Adding campden tablets (potassium metabisulfite.. yeah, yeah, sulfites, blah blah) will hinder any wild yeast in your new mead, as well as help prevent oxidation during transfer. At the same time, adding potassium sorbate will prevent further fermentation by hindering yeast reproduction. I recommend transferring to a new container in this step, so that you get your mead off the sediment to aid clarity. For each gallon of mead you're about to transfer, add 1 crushed campden tablet and 1/2 tsp of potassium sorbate per gallon to your new container. Then, transfer the mead, give it 1-2 days to stabilize, then add any sugary additions without concern of triggering further fermentation.
Adding 1/2 - 1 cup of honey (half a cup at a time) to a 5-gallon batch will usually give you the sweetness you're looking for and will greatly enhance the natural honey aroma that's highly desirable in a mead. If you added fruit in primary, you could choose to add juice at this point as well. More than a cup of honey for a 5gal batch is often quite cloying, but really it's up to you. You're best off boiling 1-2 cups of water, pouring it into a sanitized bowl or pitcher, and adding the honey to the hot water. This will make the honey pourable, thin, and easily mixable.
Once transfer is complete, top off with a blanket of CO2 if possible to prevent further oxidation. If that's not possible, you can sanitize a bunch of marbles and put them into the fermenter to decrease headspace. Or, add water. Or, transfer to a smaller container.
Creating Balance
| BJCP Banquet at Summit Brewing Co |
Last year at the National Homebrewers Conference, we attended the pre-conference BJCP banquet where there were tables set up with tinctures & mixtures of various mead additions. These included extracts of mint, juniper, ginger, cinnamon, rose petals, and other flavoring additions. There was also a table set up with tannin in liquid and a variety of acids (including an acid blend). We were given cups, mead on tap, and free reign to blend at will. This was one of the many eye-opening experiences I had at NHC last year. It's quite an experience to taste a good mead, add a touch of acid and tannin, and realize how much the already-good mead can improve with a bit of blending. The flavor "pops", the finish becomes cleaner, and it becomes dangerously more drinkable.
Creating Multiple Meads from One
This practice of using extracts convinced me that making metheglin (herbed mead) does not involve adding herbs or spices to the fermenter, but is better off done by creating extracts of ingredients that are then added in small amounts to the base mead. Doing this is simple - soak the desired ingredient in cheap neutral alcohol to create an extract. Then, after a couple of weeks, pour a small amount of traditional mead (2oz or so) into several containers and add varying amounts of the extract to each container with an eyedropper. Figure out which one is most appealing, scale up, and voila - you now have a different mead. Try it with clove, orange peel, chili peppers, cinnamon, vanilla, or anything else you can think of. Another idea? Make a hop tea and add that to your mead.
Better yet, dry-hop! If you dry-hop in a keg, pick up a Sure Screen. It goes right onto the end of the dip tube and makes racking off the hops so much simpler (unless you get hop cones somehow wedged under the tube, causing the beer not to siphon through the transfer tubing, requiring you to have to scoop out and stir a bunch of hops to try to dislodge the cones and generating a huge mess and a lot of swearing - and potential oxidation - in the process. Good times.).
Clarifying Mead
There are two main processes for clarifying mead: wait several months or use a clarifying agent. We're impatient, so we clarify. Alberta from Bacchus & Barleycorn recommended Super Kleer KC one day, so I gave it a shot - and I haven't turned back since. The packet is composed of two pouches; after pouring the contents of the first pouch into your mead, you wait an hour and pour the contents of the second pouch. Give the mead a gentle swirl and wait a few days. After a week or so, your mead will be very clear. After three weeks, it'll be brilliant. I can't recommend this stuff enough and consider it a standard part of every mead batch we do.
After clarifying, package. We keg all our meads, but a lot of people will bottle them & age for as long as it lasts. Mead, like wine, will change as it ages, and almost always for the better. If you take care of fermentation and practice good sanitation, you should be able to enjoy your mead when it's less than 6 months old. The old philosophy of having to age meads for at least 2 years can get tossed out the window.
In my next (and last) post on meads, I'll list out some of the best resources I've found for meadmaking (ingredients, tools, and information) as well as some of the better meads I've discovered - and where to find them. Unfortunately, our selection of commercial mead is relatively poor here in KC, but we're lucky to have a meadery in Weston as well as the option to have mead mail-ordered (in Missouri).
Reference -
part one
part two
part three
Reference -
part one
part two
part three
Tuesday, April 26, 2011
Making Mead - Part Three
Picking up where we left off in part two, we’ve now got two meads that are starting to ferment. Up to this point, all we’ve done is mix ingredients together. Of course, every meadmaker’s process is going to differ in some way. Some meadmakers heat their mead must on the stove, some even to the point of boiling (not to be confused with burnt mead, which is mead that is slowly boiled for several hours to develop complex caramelization). These posts are just one way to approach making mead; certainly, if you make your own, you’ll find your own approach. One thing is certain, however – a healthy fermentation is key, and there are some things you can do to promote one.
Managing your Fermentation
The first few days of fermentation are crucial to making quality mead. During this time, the yeast need a nutrient-rich and yeast-friendly environment to properly and fully ferment the sugars without creating problematic off-flavors and fusel alcohols. A lot of people will say that you have to age mead a few years before it’s even drinkable, but that’s likely because the fermentation didn’t go as well as it could have. Of course, mead does typically age extremely well, and tends to improve over time, but a fresh young mead is certainly drinkable if you make it right.
Specifically, you need to manage the following:
- Fermentation temperature (keep it in the 68-72 range)
- The pH of your must (keep it above 3.2, ideally around 3.4 - 3.6)
- Adequate FAN, vitamins, and minerals
You can check your pH levels with pH strips or a pH meter. If you have pH strips for beer, you’ll need to buy ones that are specifically intended for wine, as the pH range will go lower than the beer strips register. They should go under 3.0. We have a pH meter that we use for both mead and beer, and I love the thing. It’s kind of a pain in the ass to calibrate every time (mostly because I'm impatient), but it’s a lot more accurate and reassuring than pH strips.
If you need to increase your pH, which is often the case because honey is moderately acidic, you can add Calcium Carbonate (CaCo3) or Potassium Hydroxide (KOH). We use KOH because it does not leave behind carbonate, which can leave behind a chalky, salty taste. We create a 2M KOH solution at home (I bought our KOH at Essential Depot) and add the solution in 10ml increments to our 5 gallon batches. Pick up an infant syringe at a pharmacy to easily measure out 10ml (it’s also a great tool for measuring out Star San or Iodophor – 6ml per gallon of water for a properly-diluted sanitizing solution). Wear gloves when you mix & measure this, as it will actually break down the lipids in your skin. Ew.
Degassing Mead
You’ll also need more DAP and Fermaid-K during fermentation, and will add these to the fermenting mead along with your pH adjustments. I learned the hard way, though, that adding these dry powders provides thousands of nucleation sites when added to the mead, causing the well-known mead volcano. You could do a 5-gallon batch in a 20-gallon bucket so that the foam doesn’t spill over the top. Or, you could degas your mead.
| You, too, can have your own homemade volcano |
Degassing basically removes CO2 from solution through rapid agitation of the must. Guess what we use – yep, the handy dandy lees stirrer. Some people use a whisk, others use brewing spoons, but I’m not that interested in getting a workout when I do my nutrient additions, so I use the lazy method. Sanitize the lees stirrer and the neck of your carboy and whirr away. I usually whisk for about 5-8 minutes and sometimes have to stop to avoid a mead volcano. A lot of CO2 is removed in this process and will allow you to safely add your nutrients without making a mess. Amateur video ahead...
There’s another upside to degassing, though, and that is to lessen strain on the yeast. I’ve read that you need to degas your must because CO2 levels can become toxic to your yeast, but I’ve also read that it’s nearly impossible to get enough CO2 to a level of actual yeast toxicity. What it will do is help keep your fermentation chugging along, and remove CO2 early on so that you get a still mead more quickly than just letting it sit/age for months.
We use the Curt Stock fermentation schedule, which requires 8 days of fermentation care as follows:
Day 0: make the mead, adding 4.5g Fermaid-K and 2g DAP.
Days 1, 3, 5, 7, and 8: Degas only
Days 2, 4, and 6: Degas, then add 4.5g Fermaid K, 2g DAP, and 10ml KOH
That's it. More involved than most beer, but still extremely easy.
Monday, April 25, 2011
Making Mead - Part Two
In my prior post, I talked about the two primary facets of meadmaking that I think contribute the most to making a good-tasting mead: yeast health and suitable honey. Of course, sanitation and proper care go without saying. This post gets into the pre-fermentation details. Most of this information is a result of attending NHC sessions last year, reading Ken Schramm's book, and going through Kris England & Curt Stock's presentation from the 2008 NHC.
A couple of weekends ago, John and I threw together three batches of mead in one afternoon – two fruit meads (melomels) and one traditional. It's so easy to put together, it's almost silly to do just one batch at a time. The most frustrating and time-consuming part of that day’s session was that our honey was fully crystalized and it took about 2 hours – and a lot of boiling-hot water – to get it to a pourable consistency (and even then, “pourable” is an overstatement; it was more like “soft enough to squeeze through the narrow neck of a gallon jug”). It’s worth noting that Tupelo & White Sage won’t likely crystalize at room temperature; in my experience (and I’m not alone), tupelo makes better-tasting mead than white sage, but sage can be a great base for fruit & spice meads as it’s quite neutral.
| Weighing the honey on a postal scale I had added a gallon of water to the carboy prior to adding honey (the rest of the water got added once I finished with all the honey) |
First, Devise a Recipe
I like using the mead calculator on GotMead.com. You can determine how much honey, juice, fruit, water, and other ingredients you need to achieve your desired mead. By playing around with quantity of honey & other fermentables while keeping the target volume the same, I can come up with amounts of ingredients to achieve my desired starting gravity.
To know where your starting gravities should land, you can look at the BJCP’s guidelines for hydromel (light), standard, and sack (strong) meads. For instance, for the pyment I knew I wanted a mead that would be at the upper end of the standard-strength range (around 14% ABV). To know how much honey to use with 4 pounds of grape concentrate (which I know is 68 Brix), I added this in the calculator as a 2nd ingredient with 68% sugar content. With 12 pounds of honey, this brought me to just under the top of the standard category. Perfect!
I'll pick two of the three recipes we did - one melomel (the pyment) and one traditional. Both are 5-gallon batches.
Step 1: Prepare the Ingredients
For the Traditional Mead (OG 1.115):
16 pounds of Orange Blossom honey
4 gallons of drinking water from Hy-Vee
1 tsp of Calcium Chloride to provide calcium to the must & aid fermentation
4.5g of Fermaid-K for yeast nutrition
2g of DAP as a source of nitrogen
For the pyment (melomel made with grapes) (OG 1.111):
12 pounds of Orange Blossom honey
4 pounds of Beaujolais grape concentrate (Alexander's brand, 68 Brix)
4 gallons of drinking water from Hy-Vee
1 tsp of Calcium Chloride to provide calcium to the must & aid fermentation
4.5g of Fermaid-K for yeast nutrition
2g of DAP as a source of nitrogen
Step 2: Assemble the must
Put the water and any juices & herbs into the fermenter, then add your honey. The easiest way to measure your honey is by weight – we put our carboy on a postal scale then pour the honey into the carboy until the desired weight is achieved. Once all ingredients are in there (except for maybe a gallon or two of water), you get to the fun part: mixing.
| Before mixing |
I don’t recommend doing this without a lees stirrer. I’ve done it a few times without one, and can’t believe it took me 3 batches to finally pick one up. Stirring honey into water by hand is not fun. So, do yourself a favor and get one (and a drill if you don’t have one already).
| The business end of a lees stirrer The little "wings" fan out when the stirrer is in rotation. |
The wand end of the lees stirrer just goes right into your drill – sanitize it, hook it up to your drill, put it into your fermenter, and whirr away. Be careful not to scratch the bottom or sides of your plastic container. In a few minutes, your honey should be completely blended into the honey. Add the Calcium Chloride, DAP, and Fermaid-K, mix lightly, then cover your fermenter (with foil, a cap, or a lid) and go prepare your yeast.
| After mixing |
Step 3: Prepare your yeast
If you’re using dry yeast, you need to rehydrate it. Sprinkling it directly onto the must can cause slow fermentation because you can end up with clumped-up yeast cells, preventing all of the cells from rehydrating and contributing to fermentation. Rehydrating with Go-Ferm will kick-start your fermentation by providing your yeasties with nutrients while they go back to their full & proper shape. Obviously, if you’re using liquid yeast, skip this step.
| Fermaid-K, DAP, and Go-Ferm for happy yeast You'll need a lot of this. |
Boil some water and pour it into small containers (we use small coffee mugs, but any small container will do). You don’t need a lot of water – maybe 2/3 of a cup at most. Cover the small containers with foil and let them cool to 115 degrees (be sure to sanitize your thermometer every time you check the water temp). Once you get to 115F, add the Go-Ferm. Cover your containers again and let the Go-Ferm sit in the water while it continutes to cool to about 105F. Once you hit 105, add the yeast and let it rehydrate for about 15-30 minutes. After that time has passed (or if you’re using liquid yeast), pitch your yeast, hook up a sanitized blow-off assembly, place your fermenter in a dark place that’s about 68-72F, and you’re done!
Sunday, April 24, 2011
Making Mead - Part One
I first wrote about mead a while back (wow, was it really 2 summers ago?) and have continued to learn quite a bit since then. I wrote about making a basic mead, which included mixing honey, water, and nutrients over 3 days ("staggered nutrient additions"). Since then, we've learned a few more details to help make even better mead. In short:
- Yeast health is key
- Your choice of honey matters
- Did I mention yeast health?
Making mead, as mentioned, is essentially mixing honey & water together, then pitching yeast and letting fermentation take its course. No boiling is needed (though some people do boil the must), so preparation is extremely simple. Getting the honey & water mixed together is the hardest part of "brew day". But really the difficulty comes into play once the yeast is pitched.
Yeast Health
Honey is extremely nutrient-poor, so yeast struggles to ferment the sugars. Additionally, FAN (Free Amino Nitrogen) is quite low in mead must, unlike most beer wort. Meadmakers therefore need to add a source of nitrogen in addition to other yeast nutrients. Nitrogen is typically added to must in the form of Diammonium Phosphate (DAP), which is commonly available at a homebrew retailer. Other nutrients to promote yeast growth are found in nutrient blends such as Fermaid K. It's composed of fatty amino acids, vitamins like thiamin & biotin, and various minerals. Like DAP, Fermaid-K is something you can easily buy at a homebrew supply shop.
How about the yeast itself? We typically use dried yeast from Lalvin, but have used Wyeast liquid yeast as well. I really like Lalvin 71B and D-47, but I think it's important to read through a yeast's characteristics and find one that suits your goal well. Lalvin posts all their yeast profiles online. This chart will give you a good overview of the yeast characteristics.
If you are using dry yeast, use a yeast nutrient during rehydration to assist mineral & amino acid uptake. We use Lallemand's "Go-Ferm" product which is, again, available at homebrew supply retailers.
Choice of Honey
When we first started making mead, I was picking up local honey at farmers' markets. The resulting meads were good, but not as good as the ones I was tasting at competitions. I attended a mead session at NHC last year where we tasted raw honey next to resulting mead. What that made me realize was that honeys have their own unique flavors which carry over into the final product; it helped me to understand why a lot of successful meadmakers turn to tupelo and orange blossom honeys again & again.
I found a bunch of honey suppliers online (Millers, Draper Bee, Bee Folks, Northern Brewer) and ordered small containers of tupelo & orange blossom honeys from each. John and I tasted them side-by-side to determine our favorites and ordered those in bulk. I found that the Northern Brewer Orange Blossom was the best citrusy-tasting honey of our selections (we ordered 5 gallons of it), while Bee Folks had the most amazing floral Orange Blossom honey. Bee Folks' tupelo honey is wonderful and creamy and will be our choice for ordering tupelo in bulk.
Bee Folks also offers a ton of varietal honeys, many of which would be great for mead. Blueberry, almond, avocado, and even killer bee honey. I got to taste some killer bee mead at this year's Upper Mississippi Mashout and it was interesting... spicy, peppery, and not my favorite. But worth trying for sure. I can't recommend enough just buying a bunch of small containers of honey from various suppliers and finding out which ones you like best. Your mead will reflect the nuances of the honey you use, so it's incredibly important to select honey that is high quality and tastes good.
So there's your prep work and some stuff to think about. In the next post, I'll talk about actually making mead.
- Yeast health is key
- Your choice of honey matters
- Did I mention yeast health?
Making mead, as mentioned, is essentially mixing honey & water together, then pitching yeast and letting fermentation take its course. No boiling is needed (though some people do boil the must), so preparation is extremely simple. Getting the honey & water mixed together is the hardest part of "brew day". But really the difficulty comes into play once the yeast is pitched.
Yeast Health
Honey is extremely nutrient-poor, so yeast struggles to ferment the sugars. Additionally, FAN (Free Amino Nitrogen) is quite low in mead must, unlike most beer wort. Meadmakers therefore need to add a source of nitrogen in addition to other yeast nutrients. Nitrogen is typically added to must in the form of Diammonium Phosphate (DAP), which is commonly available at a homebrew retailer. Other nutrients to promote yeast growth are found in nutrient blends such as Fermaid K. It's composed of fatty amino acids, vitamins like thiamin & biotin, and various minerals. Like DAP, Fermaid-K is something you can easily buy at a homebrew supply shop.
How about the yeast itself? We typically use dried yeast from Lalvin, but have used Wyeast liquid yeast as well. I really like Lalvin 71B and D-47, but I think it's important to read through a yeast's characteristics and find one that suits your goal well. Lalvin posts all their yeast profiles online. This chart will give you a good overview of the yeast characteristics.
If you are using dry yeast, use a yeast nutrient during rehydration to assist mineral & amino acid uptake. We use Lallemand's "Go-Ferm" product which is, again, available at homebrew supply retailers.
Choice of Honey
When we first started making mead, I was picking up local honey at farmers' markets. The resulting meads were good, but not as good as the ones I was tasting at competitions. I attended a mead session at NHC last year where we tasted raw honey next to resulting mead. What that made me realize was that honeys have their own unique flavors which carry over into the final product; it helped me to understand why a lot of successful meadmakers turn to tupelo and orange blossom honeys again & again.
I found a bunch of honey suppliers online (Millers, Draper Bee, Bee Folks, Northern Brewer) and ordered small containers of tupelo & orange blossom honeys from each. John and I tasted them side-by-side to determine our favorites and ordered those in bulk. I found that the Northern Brewer Orange Blossom was the best citrusy-tasting honey of our selections (we ordered 5 gallons of it), while Bee Folks had the most amazing floral Orange Blossom honey. Bee Folks' tupelo honey is wonderful and creamy and will be our choice for ordering tupelo in bulk.
Bee Folks also offers a ton of varietal honeys, many of which would be great for mead. Blueberry, almond, avocado, and even killer bee honey. I got to taste some killer bee mead at this year's Upper Mississippi Mashout and it was interesting... spicy, peppery, and not my favorite. But worth trying for sure. I can't recommend enough just buying a bunch of small containers of honey from various suppliers and finding out which ones you like best. Your mead will reflect the nuances of the honey you use, so it's incredibly important to select honey that is high quality and tastes good.
So there's your prep work and some stuff to think about. In the next post, I'll talk about actually making mead.
Wednesday, March 23, 2011
National Homebrewing Competitions - AHA and Samuel Adams
Six packs of the 2010 Samuel Adams Longshot winners should be hitting KC shelves pretty soon, coinciding with a call for submissions for the 2011 contest. Last year’s competition appealed to the creativity in homebrewers, limiting entries only to BJCP category 23, “Specialty.” This category specifically targets those beers that fit into no other BJCP styles (such as American Pale Ale, Witbier, or German Pilsner).
The three winning styles were Friar Hop (Belgian IPA), Blackened Hops (Black IPA, American Black Ale, Cascadian Ale, or whatever you want to call it), and Honey B’s Lavender Wheat (Wheat ale with lavender, vanilla, and honey). You can read more about the winners and their beers on the Samuel Adams website. Or, see below if you don’t want to sign in with your birthdate information – twice.
This year’s entries are open to all 23 beer categories again, and the deadline for receipt is in early May. It’s free to enter, so why not? All the rules & regulations are posted on their website.
Speaking of competitions, this coming Wednesday (March 30th) is the last day to register your beers with your National Homebrewing Competition site of choice . If you haven’t registered your beers online already, you’d better do it now; nearly 2/3 of the regional sites have been filled, you're too late. With nine sites accepting 750 entries, all of them now full, we’re looking at a giant competition this year.
Even if you’re not entering any beers,the AHA National Homebrewers Conference itself is like nothing I’ve ever seen. Homebrew from dozens of clubs all over the country (mostly from the hosting region) show off brewing creativity, techniques like decoction mashing, and – as shown by the “everything is iced” booth last year – a bit of insanity. I wrote about our fun at NHC it last year. This year is in San Diego and promises to be yet another good time.
Evening events aside, the sessions during the day are more than worth the trip. Last year we learned about cask conditioning, finally understood keeving, and gained some invaluable tips about meadmaking. We even got to taste honey & mead side-by-side to evaluate which honeys we preferred and how the final outcomes compared to their original sources. One of the most popular sessions, probably to no one’s surprise, was a discussion hosted by the Weasel Boy Brewing's owners about Going Pro. The room was absolutely packed with serious homebrewers learning what it takes to turn a hobby into a full-blown job.
And no, we didn't attend that session.
=====================
ABOUT THE [Longshot] WINNERS AND 2011 AMERCIAN HOMEBREW CONTEST
Richard Roper’s Friar Hop Ale combines his love of hops with his affinity for spicy Belgian ales. To develop his recipe, Roper created a hybrid of two styles, uniting the big hoppy taste of an IPA with the spicy, fruity flavor of a Belgian. The toasty caramel sweetness from the malt and Belgian candi sugar mimics a Belgian ale, while the big citrus hop notes of an IPA balance the style. A spicy yeast fermentation and hints of orange and coriander round out the brew. Richard’s Friar Hop Ale is a refreshing beer that can be enjoyed any time of year.
Rodney Kibzey’s Blackened Hops is a perfect combination of deep roasted malt character and citrusy hop bitterness. Harnessing eight years of homebrewing knowledge, Rodney found that combining debittered dark malts and citrusy hops yielded a surprising and unique flavor for this brew. Its black color hints at roasted malt and coffee flavors, but it is the big hop character really steals the show. Packed with citrusy and piney American hops, this beer has a big flavor and clean bitterness. This is Rodney’s second LongShot American Homebrew Contest win; he won in 2007 with a Weizenbock and his beer was included in the 2008 LongShot Variety Pack.
Caitlin DeClercq has worked as a member of the Samuel Adams sales team since 2006. She created her Honey B’s Lavender Wheat with dried lavender petals, giving it a fragrant but soft aroma. A citrus tartness and slight sweetness from the honey and vanilla balance out the finish in this California resident’s brew; perfect to sip while kicking back and relaxing.
(copied directly from the link above)
Friday, February 25, 2011
Blowing off the dust....
Now that the 2011 Kansas City Bier Meisters Homebrew competition is over and behind us, it's time to get this thing back up & running. Combine organizing that competition with a new position I started last month, and you have a very busy me... and a very neglected blog.
So to get caught up... let's see here...
- Our annual homebrew competition was a lot of work, but definitely fun. We had a lot of great judges & stewards this year and hope to do the same in 2012. If you're a homebrewer and looking for blind feedback on your beers (and meads & ciders), this is a great way to do it. Plus, we were treated to presentations/discussions by Paul Kavulak from Nebraska Brewing Co & Stephen Hale from Schlafly Taproom. Both very personable, interesting, and entertaining guys. It's every year in February, with different speakers each time; if you missed it this year, pay attention this fall when we start planning and posting information to the comp website.
- Speaking of home brewing, Nationals is coming up quick. If you want to give it a shot at making it past the first round & into the finals, the deadline is late March. Get to brewing!
- I spent a few days in Austin last week and was able to get out to a handful of places. I checked out Lovejoy's and Ginger Man on my own, but spent my third evening getting a tour of Austin from I Love Beer's Lee with the great company of his fellow beer writer (also a homebrewer), Debbie. He wrote a fun summary of our evening out in his blog (check it out!). Though I had a great time visiting several places, for me there were two specific highlights of the trip:
- Discovering a new brewery down there called Jester King. I only had two beers from them (a Rye IPA and a barrel-aged Dark Mild - appropriately named "Commercial Suicide"), but both were outstanding. If you get a chance to try anything from them, don't pass it up.
- Hanging out at the Whip-In. The place was like nothing else - convenience store meets craft beer bar meets Indian cafe ... and they're adding a brewery in the future. What I particularly liked about this place was that they had two sections of taps: one with craft brews (many of them local), and another smaller one with 'vintage' brews. Among others, they had a St Arnold Divine Reserve #6 on tap, a barleywine nearly 3 years old. Divine indeed.
There are more things of course, but I'll save those for later. Let the blogging resume!
Saturday, November 6, 2010
A Hoppy Halloween Indeed
We drove to Fargo last weekend for the Prairie Homebrewing Companions' 13th annual homebrew competition. Their main speaker was Jamil Zainasheff, a homebrewer known for co-authoring 2 books (Brewing Classic Styles and Yeast: the Practical Guide to Fermentation) and for The Jamil Show, a radio podcast on TheBrewingNetwork.com
Chip from Northern Brewer's BrewingTV was there to capture the weekend, and here's the episode he put together. It's just shy of 1/2 hour and a good overview of what a competition is like. There are a few highlights, including:
Brewing TV - Episode 23: Hoppy Halloween & Jamil Zainasheff from Brewing TV on Vimeo.
Chip from Northern Brewer's BrewingTV was there to capture the weekend, and here's the episode he put together. It's just shy of 1/2 hour and a good overview of what a competition is like. There are a few highlights, including:
- Jamil announces that he's opening a brewery in the east bay next year
- The PHC's club yeast bank
- Our friends Tom & Nancy won the ProAm and get to brew at Summit Brewing in Minneapolis
- We won best of show for our Classic Rauchbier!
Check it out.
Brewing TV - Episode 23: Hoppy Halloween & Jamil Zainasheff from Brewing TV on Vimeo.
Wednesday, June 23, 2010
Home from the Great Beery North
Well, that was a whirlwind. We drove up to Ames last Tuesday night and had dinner at Olde Main downtown then stayed overnight at a hotel nearby. The food was pretty decent, and the beer was OK, but I probably won't go out of my way to go there again. Instead, if you're up in that area seeking out brewpubs, check out Court Ave or Raccoon River.
Wednesday's 4-hour drive took us to just south of Minneapolis, where the 2010 National Homebrewers Conference was held. We stopped at Blue Max and picked up a few cases of beer (MOSTLY REFRIGERATED!!) that we can't get in the KC area, loaded up the car, and headed to the hotel. After we registered for the conference, we headed to Happy Gnome for lunch, which ended up being one of my favorite places. The food was tasty and so was the beer; we got a 5-beer sampler that included, in order of preference:
The trip went down a little like this...
Wednesday
BJCP reception at Summit. After dinner and a few Summit beers, we all poured ourselves small glasses of traditional semi-sweet mead and walked around the room where small jars of various tinctures and additives were laid out. Juniper, rose, mint, tannins, acids, and other ingredients were there for us to experiment with blending and tasting. It was a unique opportunity and the most useful thing I took away from it was that traditional mead really needs acid and tannin, just like white grape wine.
Thursday
Seminars started in the afternoon. We went to lunch at Barley John's and enjoyed both the food and beer. I got the sampler (see slideshow) with lunch and enjoyed all the beers, but their porter & wild rice brown were my favorites by a long shot. Sessions took place in the afternoon, and "Pro-Brewers Night" was in the evening. Breweries set up booths around the banquet hall where we could sample their beers and collect brewery swag. While a fun time, the after-party up in the hotel was where to be that night.
Friday
Seminars all day long. I learned about specialty malts, mead making tips, optimal yeast conditions, and maturing beer. There's something special about going to a conference where everyone's hung over at the 9am sessions and no one's trying to hide it.
Friday night was one of the most entertaining and incredible experiences I've had in a while. It's club night, meaning that homebrew clubs can sign up to set up a booth and pour beer made by club members. The extent to which some of these clubs go for this event is amazing; I think my favorite in terms of decor was the MASH unit. Check out some of the photos below.
Saturday
The last day of the conference didn't go without its own merits, though the hangovers were gaining on everyone. I went to sessions on extract brewing, cidermaking, cask conditioning, blind taste tests, and how different sugars affect beer (the base was a tripel). The final social event was a banquet put on by Sean Paxton (homebrewchef) and all the beer was donated by Rogue. Salad, chicken, rice, and dessert - all made with Rogue beer ingredients and paired with a Rogue beer. Check out the menu (scroll down to the "Conference Awards Dinner Menu" section at the bottom).
We didn't win any medals, but two of our beers made it to Mini Best of Show (sort of a semi-finals round for the category), so that was an honor in itself. It's only adding fuel to the fire for next year's competition.
Click on a photo to make it larger. I highly recommend reading the letter to Mark Stutrud (owner/founder of Summit), 5th photo in.
Here's more information on the sessions that were available.
Presentations will be posted when they become available.
Check out the trailer for next year's conference. See you there?
Wednesday's 4-hour drive took us to just south of Minneapolis, where the 2010 National Homebrewers Conference was held. We stopped at Blue Max and picked up a few cases of beer (MOSTLY REFRIGERATED!!) that we can't get in the KC area, loaded up the car, and headed to the hotel. After we registered for the conference, we headed to Happy Gnome for lunch, which ended up being one of my favorite places. The food was tasty and so was the beer; we got a 5-beer sampler that included, in order of preference:
- Surly Abrasive (IIPA)
- Tyranena Benji's Chipotle Imperial Porter
- Ommegang Zuur (Flanders red)
- Fulton Sweet Child o'Vine (IPA)
- Dark Horse Perkulator Doppelbock (coffee doppelbock)
The trip went down a little like this...
Wednesday
BJCP reception at Summit. After dinner and a few Summit beers, we all poured ourselves small glasses of traditional semi-sweet mead and walked around the room where small jars of various tinctures and additives were laid out. Juniper, rose, mint, tannins, acids, and other ingredients were there for us to experiment with blending and tasting. It was a unique opportunity and the most useful thing I took away from it was that traditional mead really needs acid and tannin, just like white grape wine.
Thursday
Seminars started in the afternoon. We went to lunch at Barley John's and enjoyed both the food and beer. I got the sampler (see slideshow) with lunch and enjoyed all the beers, but their porter & wild rice brown were my favorites by a long shot. Sessions took place in the afternoon, and "Pro-Brewers Night" was in the evening. Breweries set up booths around the banquet hall where we could sample their beers and collect brewery swag. While a fun time, the after-party up in the hotel was where to be that night.
Friday
Seminars all day long. I learned about specialty malts, mead making tips, optimal yeast conditions, and maturing beer. There's something special about going to a conference where everyone's hung over at the 9am sessions and no one's trying to hide it.
Friday night was one of the most entertaining and incredible experiences I've had in a while. It's club night, meaning that homebrew clubs can sign up to set up a booth and pour beer made by club members. The extent to which some of these clubs go for this event is amazing; I think my favorite in terms of decor was the MASH unit. Check out some of the photos below.
Saturday
The last day of the conference didn't go without its own merits, though the hangovers were gaining on everyone. I went to sessions on extract brewing, cidermaking, cask conditioning, blind taste tests, and how different sugars affect beer (the base was a tripel). The final social event was a banquet put on by Sean Paxton (homebrewchef) and all the beer was donated by Rogue. Salad, chicken, rice, and dessert - all made with Rogue beer ingredients and paired with a Rogue beer. Check out the menu (scroll down to the "Conference Awards Dinner Menu" section at the bottom).
We didn't win any medals, but two of our beers made it to Mini Best of Show (sort of a semi-finals round for the category), so that was an honor in itself. It's only adding fuel to the fire for next year's competition.
Click on a photo to make it larger. I highly recommend reading the letter to Mark Stutrud (owner/founder of Summit), 5th photo in.
Here's more information on the sessions that were available.
Presentations will be posted when they become available.
Check out the trailer for next year's conference. See you there?
Thursday, June 10, 2010
Hi Ho, Hi Ho, to NHC we go!
Alas! The National Homebrewers Conference is just around the corner, and I'm pretty damn excited to go (except for the 9-hours-of-driving-each-way thing)... Some of the highlights of the conference, for me, include:
- BJCP Judge Reception on Wednesday. It's at Summit Brewing Co and will include a talk on cask vs. keg beer as well as a large educational session on varietal honey and mead.
- Pro Brewers Night on Thursday. Check out all the craft breweries that will be there. Oh boy oh boy!
- Club Night on Friday. Homebrew clubs across the country can sign up to host a booth and share beverages made by their members as well as pimp some awesome hardware. Pro-brewers night is sure to be a lot of fun, and the creativity and skill demonstrated by homebrewers always impresses and inspires me.
- Seminars! What would the NHC be without its informative sessions on how to make better beer, mead, and cider? There are a few sessions I can't wait to attend, including the Meadmaker of the Year panel and a session on yeast by Wyeast's quality control manager. And speaking of quality control, KC's own Jennifer Helber, founder of the Boulevard Quality Lab, and KC's Beer Pairing Examiner, will be presenting on bottle conditioning. Way to represent, KC!
Though it's a homebrewer conference, anyone can attend. The focus is on beer education, and many of the seminars cover ingredients, processes, and trends in home brewing. However, all of the topics could be of interest to beer enthusiasts as well. After all, learning about how different yeast strains affect fermenting beer isn't just a homebrewing topic. If that just isn't of interest, you can just buy "social package" tickets, so you can hang out on the town while all the beer nerds attend class, then go to the evening events for all the fun.
In addition to the social events and seminars, part of the conference includes the final round of homebrew judging to determine the national category winners in beer, mead, and cider. Awards are also given to Homebrewer of the Year, Meadmaker of the Year, and Cidermaker of the year. The brewer who obtains the most points during final round judging is awarded the Ninkasi award. You get 6 points for each first place, 4 points for each 2nd place, and 2 points for each 3rd place. You can imagine that winning Ninkasi means submitting a hell of a lot of homebrew...
We've got three beers in the running (American standard & premium lagers and Imperial IPA) and are pretty damn anxious to find out how we'll fare. The awards ceremony is on Saturday night, so we've still got a little while until we find out. Ninkasi is out of reach this year, but you never know what the future will bring...
Thursday, May 20, 2010
Transferring Your Homebrew via CO2
We made a major improvement to our home brewery last night, one that Mr Wort Hog's been bugging me about for a while. If you've ever had to transfer beer from a carboy to another container, you know what a pain in the ass it can be. We've tried it all - blowing on one end of the carboy cap (too germy), creating a siphon by filling the tubing with StarSan (fails regularly), creating suction by using a turkey baster at the output end of the tubing (rarely works), and squeezing the carboy to create pressure (never got that one to work). The whole carboy + racking cane/carboy cap/tubing assembly was frustrating to no end. And an auto-siphon just introduces too much oxygen to the process, so it's not even a participant.
Enter CO2 transfer.
Mr Wort Hog found some information on the Maltose Falcons website and sent me a link back in, uh, January? I finally took the time to order the parts online and we assembled & used it last night. The verdict? Best way to transfer beer. Ever.
The basic hookup goes like this: Connect a CO2 tank to the carboy containing the fermented beer, which pushes the beer through a racking cane and some beer line. The beer line is hooked up to the keg through a flare fitting, going in through the "out" beer line dip tube and into the keg. The benefits to this are multiple, but the greatest improvement is the introduction of a completely closed transfer - and CO2 purging of the lines. That is, there's no introduction of oxygen (or mouth-based germs) to the transfer. Let's take a look.
CO2 tank > gas line > carboy cap > carboy > racking cane > beer line > flare fitting > keg
From the CO2 tank, we've got a male/female quick disconnect from the regulator to the carboy cap. In the picture below, the keg is to the lower right (yes, that's the regulator peeking out there) and a freezer containing the carboy on the left. And a roll of paper towels lurking in the background.
The gas line then goes into the carboy: A 1/4" flare-to-barb fitting goes into the small little outlet on the carboy cap and a 1/4" nut & 5/16" barb fitting connects that to the gas line. In other words, shove the 1/4" fitting into the carboy cap and the nut fitting into the end of the gas line then screw them together. Here, we have the nut fitting in the gas line secured by a worm clamp. Click on the picture to see a much better picture of the detail.

So before the transfer, fill the keg with CO2 and assemble the liquid end (racking cane, carboy cap, beer line, keg disconnect) with sanitizer. Purge some of the CO2 from the keg just to get a bunch of it out of there, then hook the assembly up to the keg before putting it in the carboy, and this will cause the CO2 in the keg to exit via the assembly. You've just purged your liquid lines with CO2.
Put the liquid assembly onto the carboy and turn on the CO2 to about 3psi. This will push the beer back through the liquid assembly and into the keg.
A few minutes later, you've got all your beer in your keg and have minimized its exposure to oxidation.
Sounds like a lot of work, I guess, but I assure you it is FAR less work and MUCH more sanitary (and O2-free) than other transfer methods. I only wish I'd ordered the parts a lot longer ago...
Enter CO2 transfer.
Mr Wort Hog found some information on the Maltose Falcons website and sent me a link back in, uh, January? I finally took the time to order the parts online and we assembled & used it last night. The verdict? Best way to transfer beer. Ever.
The basic hookup goes like this: Connect a CO2 tank to the carboy containing the fermented beer, which pushes the beer through a racking cane and some beer line. The beer line is hooked up to the keg through a flare fitting, going in through the "out" beer line dip tube and into the keg. The benefits to this are multiple, but the greatest improvement is the introduction of a completely closed transfer - and CO2 purging of the lines. That is, there's no introduction of oxygen (or mouth-based germs) to the transfer. Let's take a look.
CO2 tank > gas line > carboy cap > carboy > racking cane > beer line > flare fitting > keg
From the CO2 tank, we've got a male/female quick disconnect from the regulator to the carboy cap. In the picture below, the keg is to the lower right (yes, that's the regulator peeking out there) and a freezer containing the carboy on the left. And a roll of paper towels lurking in the background.
The gas line then goes into the carboy: A 1/4" flare-to-barb fitting goes into the small little outlet on the carboy cap and a 1/4" nut & 5/16" barb fitting connects that to the gas line. In other words, shove the 1/4" fitting into the carboy cap and the nut fitting into the end of the gas line then screw them together. Here, we have the nut fitting in the gas line secured by a worm clamp. Click on the picture to see a much better picture of the detail.
A racking cane goes through the main opening in the carboy cap (this can take a little smooth talking and cajoling) and connects to beer line. I got the wrong size beer line (it doesn't fit onto the racking cane), so we used a bit of 3/8" ID silicone tubing and a worm clamp to ensure a tight transfer. Hey, it works.
That beer line, then, goes to the keg. The other end of the beer line has a barb quick disconnect that goes to the OUT line on the keg. That's it.
So before the transfer, fill the keg with CO2 and assemble the liquid end (racking cane, carboy cap, beer line, keg disconnect) with sanitizer. Purge some of the CO2 from the keg just to get a bunch of it out of there, then hook the assembly up to the keg before putting it in the carboy, and this will cause the CO2 in the keg to exit via the assembly. You've just purged your liquid lines with CO2.
Put the liquid assembly onto the carboy and turn on the CO2 to about 3psi. This will push the beer back through the liquid assembly and into the keg.
A few minutes later, you've got all your beer in your keg and have minimized its exposure to oxidation.
Sounds like a lot of work, I guess, but I assure you it is FAR less work and MUCH more sanitary (and O2-free) than other transfer methods. I only wish I'd ordered the parts a lot longer ago...
Monday, May 17, 2010
I'll take American Craft Beer History for $200, Alex
In the spirit of American Craft Beer Week, here's a little bit of trivia about some true American craft beer pioneering. (I'd say pionbeering, but that might be just a bit too much...)
Back in the 1980s, Scott Birdwell out of Houston was in San Rafael, CA for an annual home beer & wine convention, when he met up with Byron Birch. Byron, owner of a homebrew shop in San Rafael, shared with Scott a recipe for a dark ale named "Purple Passion Dark Ale" (I am not sure I'd admit to that). The recipe made a beer that was dark, malty, a little roasty, quite hoppy - and did very well in state competitions as well as with customers. It was, however, way out of style for any of the BJCP brown ale categories, so it never fared well against style standards or national competitions.
Scott enjoyed the beer so much, however, that he decided to create a new "California Dark" category for Houston homebrew competitions (named such as a nod to his California friends). Within a couple of years, the American Homebrewers Association (AHA) added the dark, hoppy style to its style categorizations and named it "Texan Brown Ale" due to the popularization of the style in regional competitions there. Over time, the AHA renamed the style to...
(drumroll, please)
... American Brown Ale.
Yep, the style we know and love today as American Brown overcame prior lives as Purple Passion, California Dark, and Texas Brown. If it managed to survive those, surely it's worth drinking. So there you have it - an American beer style favored and recognized by homebrewers, then popularized by commercial craft breweries. Truly a great example of the spirit of American Craft Beer week.
Beers within this style should be dark in color and should taste slightly roasty (but not as roasty as a stout or porter), chocolatey, malty, and at least moderately hoppy (if not very hoppy). The hops definitely play a prominent role in American Brown ales, and they're typically American (citrusy, piney, resiny). Contrast this to English brown ales that are sweet and malty with a low hop profile (which aren't really available here) or are dry, caramelly, nutty, and also have a mellow hop flavor and aroma (think Newcastle or Samuel Smith Nut Brown).
Probably the first commercial American Brown was Pete's Wicked Ale (brewed by Pete's Wicked, started by homebrewer Pete Slosberg), but some great examples of the style include Bell's Best Brown, Lost Coast Downtown Brown, and Moose Drool (in cans!).
Speaking of home brewing (and craft beer, while we're at it), did you know Bell's Brewing started out nearly 30 years ago as a homebrew supply shop named Kalamazoo Brewing Company?
Now you do.
Back in the 1980s, Scott Birdwell out of Houston was in San Rafael, CA for an annual home beer & wine convention, when he met up with Byron Birch. Byron, owner of a homebrew shop in San Rafael, shared with Scott a recipe for a dark ale named "Purple Passion Dark Ale" (I am not sure I'd admit to that). The recipe made a beer that was dark, malty, a little roasty, quite hoppy - and did very well in state competitions as well as with customers. It was, however, way out of style for any of the BJCP brown ale categories, so it never fared well against style standards or national competitions.
Scott enjoyed the beer so much, however, that he decided to create a new "California Dark" category for Houston homebrew competitions (named such as a nod to his California friends). Within a couple of years, the American Homebrewers Association (AHA) added the dark, hoppy style to its style categorizations and named it "Texan Brown Ale" due to the popularization of the style in regional competitions there. Over time, the AHA renamed the style to...
(drumroll, please)
... American Brown Ale.
Yep, the style we know and love today as American Brown overcame prior lives as Purple Passion, California Dark, and Texas Brown. If it managed to survive those, surely it's worth drinking. So there you have it - an American beer style favored and recognized by homebrewers, then popularized by commercial craft breweries. Truly a great example of the spirit of American Craft Beer week.
Beers within this style should be dark in color and should taste slightly roasty (but not as roasty as a stout or porter), chocolatey, malty, and at least moderately hoppy (if not very hoppy). The hops definitely play a prominent role in American Brown ales, and they're typically American (citrusy, piney, resiny). Contrast this to English brown ales that are sweet and malty with a low hop profile (which aren't really available here) or are dry, caramelly, nutty, and also have a mellow hop flavor and aroma (think Newcastle or Samuel Smith Nut Brown).
Probably the first commercial American Brown was Pete's Wicked Ale (brewed by Pete's Wicked, started by homebrewer Pete Slosberg), but some great examples of the style include Bell's Best Brown, Lost Coast Downtown Brown, and Moose Drool (in cans!).
Speaking of home brewing (and craft beer, while we're at it), did you know Bell's Brewing started out nearly 30 years ago as a homebrew supply shop named Kalamazoo Brewing Company?
Now you do.
Wednesday, April 28, 2010
On the Road Again: St Louis
This post is part 2 of our our homebrew judging adventures this spring. Our trip to the other side of the state was probably one of my favorite visits to date. The weather was perfect (upper 70s and blue sky!), the beer was excellent, and we found some great new places for food. The main purpose of our trip was to judge homebrew at the Garage Brewers Society (GBS) Champion of the Pint competition, but we made a full weekend out of it.
Our arrival in town on that Friday evening was initiated by a small trip to Trader Joes in Chesterfield to pick up some snacks (and mesquite honey to make mead), then a hop over to the International Tap House for some beers. I was exhausted but mustered enough strength and stamina to drink a few beers, including the spectacular Avery Black Tot. Take note - this will be available in bottles at the Flying Saucer's 2nd anniversary bash this Sunday. It's a stout aged in rum barrels that really impressed me - sweet but not cloying, boozy without being hot, and lots of complex fruit character (is that raisin? Prune? No wait, fig?).
Saturday was the competition, and we worked up a hunger judging a bunch of homebrews. We're both big fans of traditional Neapolitan pizza, but it's unfortunately relatively hard to find in most parts of the country. The Good Pie in St Louis brings the style to the Midwest, and with competence.
Our arrival in town on that Friday evening was initiated by a small trip to Trader Joes in Chesterfield to pick up some snacks (and mesquite honey to make mead), then a hop over to the International Tap House for some beers. I was exhausted but mustered enough strength and stamina to drink a few beers, including the spectacular Avery Black Tot. Take note - this will be available in bottles at the Flying Saucer's 2nd anniversary bash this Sunday. It's a stout aged in rum barrels that really impressed me - sweet but not cloying, boozy without being hot, and lots of complex fruit character (is that raisin? Prune? No wait, fig?).
Saturday was the competition, and we worked up a hunger judging a bunch of homebrews. We're both big fans of traditional Neapolitan pizza, but it's unfortunately relatively hard to find in most parts of the country. The Good Pie in St Louis brings the style to the Midwest, and with competence.
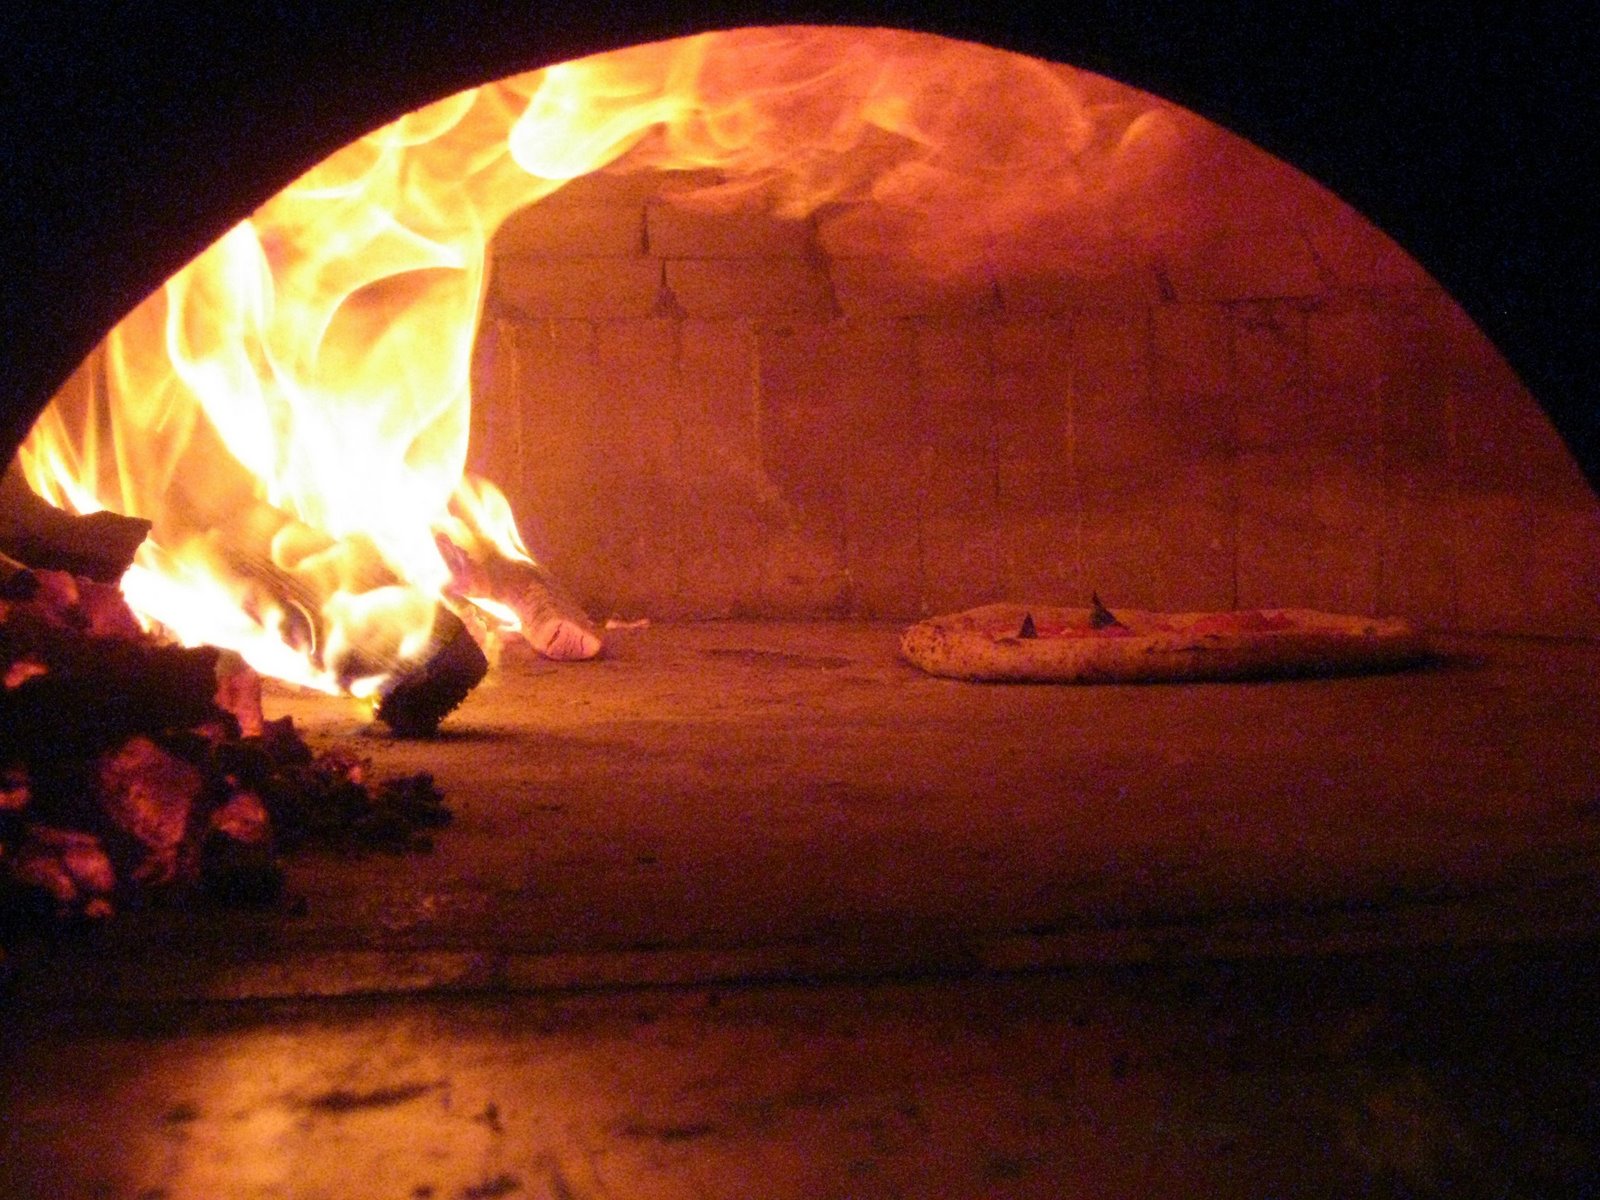
We arrived around 7pm, made a bee-line for the bar, and ordered the cured meat plate and a couple of beers. The plate came with a good assortment of prosciutto, salami, pancetta, and a couple other items I can't recall. It was served with a piece of olive-oil-brushed pizza crust which was a wonderfully thin, charred, crispy-chewy authentic Neapolitan crust. I'm talking "baked in a wood oven at 900 degrees Fahrenheit for less than two minutes" kind of awesome.
I washed that down with the O'Fallon Wee Heavy that I thoroughly enjoyed, but I wish I'd at least taken a few notes as I don't really remember the specific qualities of the beer (hey, it was a long day). Our main dish was the Pizza Napoli: anchovies, mozzarella, chili, and basil. Simple, fresh, and delicious. It was my first pizza I've ever had with anchovies, and I was surprised at how much I enjoyed it - and I would definitely recommend it, even if you're hesitant about fish on pizza. While the tap and bottle lists aren't extensive and their website's out of date, what's on is very thoughtful and current. And if you're dying to know what they do have, it looks like they frequently tweet tap announcements.
We crossed the street to Buffalo Brewing, where we enjoyed very good versions of a double IPA and a sweet stout. Incidentally, the sweet stout was the gold-medal winner of a GBS chili-cookoff competition - thereby earning the right to be brewed & served at Buffalo. Way to support local home brewers, Buffalo! These guys are kind of in a strange location for a brewpub, as there are a few night clubs immediately near by and - as a result - lots of people in fancy clubber garb standing alongside red velvet ropes. Despite that, I recommend checking this place out if you're ever in STL. Every time we've gone, we've had good beer and the staff is always friendly.
We then we took the car back to our hotel before heading off to Schlafly's taproom to close the night. Schlafly was great, as always, and I've written about them before so I won't go into it again here. I sure do love their Kölsch, though, and always enjoy having it on tap.
The next morning, we enjoyed a wonderful brunch at Bridge, another fine beer establishment in St Louis. Owned by David Bailey, who also owns Bailey's Chocolate Bar and Rooster, Bridge offers over 45 craft beers on tap and over 100 from a bottle. What I really liked about Bridge was that they offered any tap beer in a 4oz glass. It's a perfect size for getting a full impression of a beer without growing tired of it - alternately, it provides a great way to sample a handful of strong beers without getting completely wasted.
As for food, we stuffed ourselves silly. We ordered smoked paprika popcorn (good, but not amazing) and a plate of mixed house pickles to start. The pickled grapes were a lot of fun and I was surprised when our bartender said some people get pissed that they include them. We also ordered a board of roasted duck breast on focaccia with cassis conserve as well as a small side of salt & vinegar potato salad. The board of duck breast was HUGE (8 pieces I think) and we didn't finish it, but it was wonderful. The potato salad was neither as salty or vinegary as I expected, which led to a bit of disappointment. I was expecting something like salt & vinegar chips (which I adore), but it was more like cold German potato salad that needed more salt.
Finally, for our main and final course, we ordered a plate of mixed cheese with more focaccia: Methusela from Heartland Creamery, Comté Marcel Petite, and Rogue Creamery Smoked Blue (which turned out to be their regular Oregon Blue, not the smoked-over-hazelnut-shells variety. Bummer.).
Overall, we had a great time in St Louis and no doubt brought home a few thousand well-earned calories to boot. Regardless, I look forward to our next trip out there to explore more of the city's beer destinations. New places seem to be popping up pretty frequently and the craft beer scene is really taking off.
And so this post ends with a nod to St Louis Craft Beer Week. After our last visit, we look forward to yet another one of our own St Louis Craft Beer Weekends.
We then we took the car back to our hotel before heading off to Schlafly's taproom to close the night. Schlafly was great, as always, and I've written about them before so I won't go into it again here. I sure do love their Kölsch, though, and always enjoy having it on tap.
The next morning, we enjoyed a wonderful brunch at Bridge, another fine beer establishment in St Louis. Owned by David Bailey, who also owns Bailey's Chocolate Bar and Rooster, Bridge offers over 45 craft beers on tap and over 100 from a bottle. What I really liked about Bridge was that they offered any tap beer in a 4oz glass. It's a perfect size for getting a full impression of a beer without growing tired of it - alternately, it provides a great way to sample a handful of strong beers without getting completely wasted.
As for food, we stuffed ourselves silly. We ordered smoked paprika popcorn (good, but not amazing) and a plate of mixed house pickles to start. The pickled grapes were a lot of fun and I was surprised when our bartender said some people get pissed that they include them. We also ordered a board of roasted duck breast on focaccia with cassis conserve as well as a small side of salt & vinegar potato salad. The board of duck breast was HUGE (8 pieces I think) and we didn't finish it, but it was wonderful. The potato salad was neither as salty or vinegary as I expected, which led to a bit of disappointment. I was expecting something like salt & vinegar chips (which I adore), but it was more like cold German potato salad that needed more salt.
Finally, for our main and final course, we ordered a plate of mixed cheese with more focaccia: Methusela from Heartland Creamery, Comté Marcel Petite, and Rogue Creamery Smoked Blue (which turned out to be their regular Oregon Blue, not the smoked-over-hazelnut-shells variety. Bummer.).
Overall, we had a great time in St Louis and no doubt brought home a few thousand well-earned calories to boot. Regardless, I look forward to our next trip out there to explore more of the city's beer destinations. New places seem to be popping up pretty frequently and the craft beer scene is really taking off.
And so this post ends with a nod to St Louis Craft Beer Week. After our last visit, we look forward to yet another one of our own St Louis Craft Beer Weekends.
Friday, April 16, 2010
On the Road: Des Moines
2010 has been the first year of multiple competitions for the Wort Hogs. We started off by entering the Upper Mississippi Mashout, then participating in the KC Bier Meisters annual competition by submitting entries and judging. Last month we headed up to Des Moines to help judge at the IBU Open, and we spent this past weekend in O'Fallon and St Louis to judge at the Garage Brewers Society's first annual Champion of the Pint. On that trip, we not only brought back our 14th medal of the year, we heralded passing 190,000 miles on our odometer. I'm looking forward to passing the 200,000 mark toward the end of the year after driving to the National Homebrewers Conference as well as several more competitions in the fall. I've had an incredible time so far at all the homebrew competitions and our corresponding travels, so I thought I'd make a few posts out of our journeys ... First up: Des Moines.
We were there over the weekend of March 13th, arriving Friday evening after work. We made it a point to hit up a couple of brewpubs, Raccoon River and Court Ave Brewing, as well as a couple of beer bars. Both brewpubs had great beer, and I recommend stopping by both if time allows.
We first hit up Raccoon River and ordered their sampler paddle, which included your standard lineup of an IPA, a red, light ale, brown, stout, a seasonal (porter, I think) - and something I've never had before: a vanilla cream ale. I really enjoyed the beer on my first two sips, but after a while the amount of vanilla extract in the beer wore on me. It was pretty thin in body and lower in carbonation than I would have preferred. I think it'd be quite good on a really hot day with a splash of orange juice and higher carbonation.
We trekked a half mile east to Court Avenue Brewing Company (and by "trekked" I mean "drove"). Mr Wort Hog ordered their Templeton Rye-aged rye ale and I, without realizing how much beer I would end up getting, ordered the massive sampler tray. I did indeed try ALL of their standard lineup (the cask ale and cider were not part of the sampler), and the German Hefeweizen was my favorite. The IPA, really a Pale Ale, was a close 2nd. I have to say, though, that their 21st Amendment ale was amazing. It's a completely different beer from Boulevard's Rye-on-Rye but every bit as delicious. Toffee and vanilla abounded, balanced by a mild spicy bitterness. But mostly toffee. It's a year-round offering now, so I highly recommend your next trip to the D.M. include Court Ave and a glass of this beer.
In the same area of Court Ave Brewing is Royal Mile, a British pub with a decent tap list. Upstairs it houses Red Monk, a Belgian beer bar with a spectacular selection of Belgian beers. We didn't stay long, as it'd been a long day already and we had a long day of judging ahead of us. However, I did get a very spritzy Belgian ale that took about 15 minutes to settle to the point of being drinkable. It came in a green bottle with a green label that had cursive writing and even a special cap to manage the amount of pressure in the bottle. I wish I'd written down the name (it was long and, well, in French), as it was very delicious but hard to drink. I suppose it's a good beer for the calorie-conscious, as it takes forever to consume. By the time your friends are finishing off their 2nd beer, you'll be halfway through this one. I
Our trip wouldn't have been complete without visiting El Bait Shop before getting out of town. There's an impressive number of Rogue beers available there (25 in all, if I'm counting accurately from their Flying-Saucer-like menu), so if you're a Rogue fan you don't want to miss it. The Wort Hogs first laid eyes on each other at a Rogue Public House (and spent many subsequent hours there), so we definitely have an attachment to the brewery... other than the fact that it makes excellent beer.
The atmosphere was laid back and friendly as well, though extremely crowded and louder than any place I think I've been to that wasn't playing live music. The volume in that place was insane, so either avoid the place on Friday & Saturday nights or learn sign language so you can have a conversation. For posterity, check out this video on YouTube showing their taps. Check your speaker volume first.
I would have liked to stop by the Hessen Haus, as it has an impressive list of German beers available, both on tap and in the bottle. It was highly recommended by our Des Moines friends but after a long day of judging and drinking, I was ready to hop in the cab and head back to the hotel room.
Overall, I was impressed by the number and quality of beer hangouts in Des Moines. I'm sure there are others in town as well, but these were the top spots we were recommended by the local homebrewers - and their named spots did not disappoint by any stretch of the imagination. Next time you're in Des Moines, any of these places should satisfy your craving for quality craft beer.
We first hit up Raccoon River and ordered their sampler paddle, which included your standard lineup of an IPA, a red, light ale, brown, stout, a seasonal (porter, I think) - and something I've never had before: a vanilla cream ale. I really enjoyed the beer on my first two sips, but after a while the amount of vanilla extract in the beer wore on me. It was pretty thin in body and lower in carbonation than I would have preferred. I think it'd be quite good on a really hot day with a splash of orange juice and higher carbonation.
We trekked a half mile east to Court Avenue Brewing Company (and by "trekked" I mean "drove"). Mr Wort Hog ordered their Templeton Rye-aged rye ale and I, without realizing how much beer I would end up getting, ordered the massive sampler tray. I did indeed try ALL of their standard lineup (the cask ale and cider were not part of the sampler), and the German Hefeweizen was my favorite. The IPA, really a Pale Ale, was a close 2nd. I have to say, though, that their 21st Amendment ale was amazing. It's a completely different beer from Boulevard's Rye-on-Rye but every bit as delicious. Toffee and vanilla abounded, balanced by a mild spicy bitterness. But mostly toffee. It's a year-round offering now, so I highly recommend your next trip to the D.M. include Court Ave and a glass of this beer.
In the same area of Court Ave Brewing is Royal Mile, a British pub with a decent tap list. Upstairs it houses Red Monk, a Belgian beer bar with a spectacular selection of Belgian beers. We didn't stay long, as it'd been a long day already and we had a long day of judging ahead of us. However, I did get a very spritzy Belgian ale that took about 15 minutes to settle to the point of being drinkable. It came in a green bottle with a green label that had cursive writing and even a special cap to manage the amount of pressure in the bottle. I wish I'd written down the name (it was long and, well, in French), as it was very delicious but hard to drink. I suppose it's a good beer for the calorie-conscious, as it takes forever to consume. By the time your friends are finishing off their 2nd beer, you'll be halfway through this one. I
Our trip wouldn't have been complete without visiting El Bait Shop before getting out of town. There's an impressive number of Rogue beers available there (25 in all, if I'm counting accurately from their Flying-Saucer-like menu), so if you're a Rogue fan you don't want to miss it. The Wort Hogs first laid eyes on each other at a Rogue Public House (and spent many subsequent hours there), so we definitely have an attachment to the brewery... other than the fact that it makes excellent beer.
The atmosphere was laid back and friendly as well, though extremely crowded and louder than any place I think I've been to that wasn't playing live music. The volume in that place was insane, so either avoid the place on Friday & Saturday nights or learn sign language so you can have a conversation. For posterity, check out this video on YouTube showing their taps. Check your speaker volume first.
I would have liked to stop by the Hessen Haus, as it has an impressive list of German beers available, both on tap and in the bottle. It was highly recommended by our Des Moines friends but after a long day of judging and drinking, I was ready to hop in the cab and head back to the hotel room.
Overall, I was impressed by the number and quality of beer hangouts in Des Moines. I'm sure there are others in town as well, but these were the top spots we were recommended by the local homebrewers - and their named spots did not disappoint by any stretch of the imagination. Next time you're in Des Moines, any of these places should satisfy your craving for quality craft beer.
Sunday, March 7, 2010
The Dirty Side of Homebrewing
If you've ever made a batch of beer, especially all-grain, you know that a large percentage of it is cleaning. Carboy, mashtun, boil kettle, tubing, kegs, bottles... it's never-ending.
Carboys (fermenters) are especially annoying to clean, because once the kreuzen drops, the scum dries around the upper inside of the top. Awesome.Soaking them overnight with a solution of Oxy-Clean and hot water typically works to get all the scum out. PBW works better. But they still require a bit of elbow grease. And kegs? Crevices abound in those things, not to mention the threads and fittings; they're a pain to clean. I spent 4 hours one Saturday cleaning kegs. This is a hobby?
John happened upon a homemade keg/carboy cleaner a few months ago and tasked me with gathering the parts. Now when it comes to plumbing and PVC parts, I'm about as useful as a screen door on a submarine. But with some plans, pictures, and a really helpful Home Depot guy, I got almost all the parts I needed. (I got the rest on a 2nd trip.)
Here was the inspiration. And these were the final plans we came up with (click on the image to make it larger):
When you build this, you'll likely need to cut the long pipe that goes into the keg or carboy. Put it all together without the glue, measure the needed length of pipe, then cut & drill holes. I drilled holes on all four "sides" of the round pipe; the holes are aligned on opposing sides, but are staggered from adjacent holes. John picked up a sump pump from eBay and the entire thing goes in an Ale Pail with 5 gallons of hot water and 2 ounces of PBW. We let this run for 15-20 minutes per keg/carboy. The heat from the pump keeps the water nice & hot through several washings.
You'll be using the lid with the pail as well, but you'll need to cut the lid with a central opening that has two notches for the keg disconnects to go through. You'll also need to cut a little notch on the side for the two electrical cables from the sump pump. The diameter of the hole should be big enough for the water to run through, but small enough for the top of a keg to sit on .
You might have to play around with the width of the disconnect notches; ours are about 1" wide and 1.5" long.
Here's the whole thing put together, with the bucket added to the background for scale (and a lovely shower curtain & liner for your viewing enjoyment). The purple stuff you see there is PVC cement primer.
We put this in our shower stall in the downstairs bathroom while it runs so that if anything should go horribly wrong, at least there's a drain.
Here's the cross fitting, where we've secured threaded fittings into two ends (the other two ends go to the elbows), then screwed threaded barbed fittings onto the ends. The beer lines are then secured with worm clamps to the barbed fittings, and we have a gas & beer disconnect secured to the ends of each.
When we wash a keg, the disconnects are secured to the proper post (in/out) and cleaning solution is then dispensed through the dip tube and gas tube. This ensures cleaning solution is being sprayed on the bottom of the keg.
When washing a carboy, simply set a carboy dryer on top of the lid (the little legs actually grab the ridges on the lid perfectly), then place the carboy inside. The long pipe should extend to about 1-2 inches from the bottom of the carboy.
This picture also shows how the electrical cables fit through that notch on the side of the lid. The shower curtain also makes a re-appearance.
The only problem we seem to have with this is that water collects at the bottom (or is it the top?) of the carboy because the 3/4" pipe takes up quite a bit of real estate in the neck of the carboy. Water enters the carboy faster than it's leaving it, causing the carboy to slowly fill with a few inches of water. We had so much water hanging out in a carboy one time that the sump pump shut off. I thought the pump had broken; turns out I just didn't read directions.
To remedy this, we'll buy a 3/4" to 1/2" reducer and a 1/2" pipe. This will also allow us to wash our glass carboys which have a very small neck opening.
If you want to make one of these and have any questions, shoot me an email. Happy cleaning!
Edited: I've uploaded more pictures of this to Flickr.
Subscribe to:
Posts (Atom)