Monday, September 19, 2011

Part 8c - The Food of Köln

Köln definitely has its own regional character - the accent, words used, the beer, and the food.

Earlier this month, I described our incredibly delicious meal of raw pork, called Hackepeter, in Wollnitz. When we went to Köln, we noticed that people were eating something similar on crusty rolls. I crudely translated part of our food menu at Gaffel and found that they serve something called "Mett" - ground raw pork seasoned with salt & pepper spread onto bread and topped with minced onion.

Sounds gross, right?

It was amazing! The texture was incredible - soft and slightly chewy, much like cured salmon or tuna sashimi. If you're ever in Köln (or the area) and see Mett on the menu, order it. Raw pork sounds pretty awful, but it's quite the opposite. And I'm rather disappointed it's not more popular here.
Mett for lunch at Gaffel

I also noted a couple of other regional specialties. One was "Kaviar", blood sausage with onions & pickles. The other was "Himmel und Äd", which is blood sausage, mashed potatoes, and applesauce. I tried Kaviar and really liked it as well, but preferred the mett.
"Kaviar" with a side salad.  Germans aren't too big on greens.


You can make your own Mett at home. I know, I know, bacteria etc. The key is grinding the meat yourself. NEVER eat raw meat that was already ground when you bought it. If you don't wnat to do this with pork, try it with beef... you'll be making steak tartare, and some great instructions on the process are over on Michael Ruhlman's blog.

Once you've ground/diced the meat (again, see the link to Ruhlman's blog above), dice up some onion (very small dice) and mix it into the meat along with a liberal dose of salt & pepper. You can add some mace, caraway, and/or marjoram if you want, but I don't believe the Mett we had was seasoned with anything other than salt & pepper.

Spread this on a crusty dinner roll or a piece of toast (rye would be excellent for this). Alternately, shape a mound onto a plate, create a little divet in the top, and crack a raw egg onto the top (wash the shell off first), then spread onto toast. I know, sounds disturbing, but it's so delicious. Really, it is.

If you want to try this without making it yourself, bluestem serves wagyu steak tartare on their lounge menu. It's half-price Tues - Fri during happy hour (5-7; 5-6:30 on Fridays), and steak tartare for $6 is a steal.

Sunday, September 18, 2011

Part 8b - The Beer of Köln


Over the course of 2 days, John and I were able to try Kölsch made by 9 different breweries. Each brewery clearly had its on take on the style, but Kölsch definitely has some defining characteristics - and, like Altbier, is served in its own special glass: the 2cl thin-walled Kölner Stange. ("SHTONG-uh".)

Kölsch is a pretty narrowly-defined style, and the following stats come from Eric Warner's book on Kölsch. The BJCP guidelines are even narrower in range. It's a filtered ale typically between 3.5-7 SRM (straw, light gold), has an OG of 1.045 - 1.050, 4.5-5.2% ABV, 16-34 IBUs, and is hopped using only noble hops. It's typically lagered for anywhere from 2-8 weeks (most Köln brewers appear to lager on the shorter end of that timeframe). It should have a soft pale malt flavor character with few fermentation flavor characteristics; it shouldn't be estery, fusely, or fruity. Lagering helps reduce diacetyl & acetaldehyde (green apple) as well.

Similar to Düsseldorf & Bamberg, the beers are often served from cask. The glasses are carried around by the servers in a tray called a Kölschkranz. The tray holds several beers at a time, and in at least a few places, the beers are filled halfway and set aside until someone orders them. The glasses are then filled to the brim and carried out. Unusual and seemingly inefficient, but fun to watch.

Another note about serving is that the person serving Kölsch (called a "Köbes") wears a long blue apron - and is typically male. While we did get our Kölsch poured by a female at one brewhaus (Reissdorf), she wasn't a Köbes. While it's not against the law to hire a female Köbes, it appears that it's just not done.

Kölschkranz at Gaffel

Filling the Stanges. You can sort of see the cable mechanism in the background that Sion uses to bring the casks up from the cellar. 

Gaffel am Dom
This was the first Kölsch we had, and it ended up being one of my favorites. It had a lot of sulphur in the nose and was a bit vineous as well. I loved the contrast of the soft pils malt with the prominent (but not dominating) hop bitterness. The sulphur was also detectable in the flavor, but it was slight. I was surprised at this, as I'd have thought sulphur would have been undesirable in Kölsch but it was a rather common characteristic. Regarding the brewery itself, it's right on the cathedral square and the first recorded mention of it is dated 1302. Sadly, it was completely destroyed in WWII but (thankfully) rebuilt in 1955.

You can find Gaffel in some parts of the country; I tend to see it on the east coast. I definitely recommend ordering a glass if you ever see it on tap.

Früh
To contrast with Gaffel, Früh's Kölsch was a lot of sweet pils malt flavor, fruity esters, and had low hop bitterness. I got a lot of apple, pear, and white wine in both the aroma and flavor; it almost seemed like watered-down apple cider. The body was light, and the finish was very dry. While I didn't enjoy this Kölsch as much as Gaffel's, it'd be perfect on a hot summer day. I don't believe you can get this in the US.

Früh was founded in 1904 and made a less-bitter ale than the other breweries at the time. Remember that leading up to the early 20th century, the popular beer at the time (wiess) was bitter and unfiltered. It's suggested that Früh led the transition to the form of Kölsch we know today, though there isn't a lot of information I could find to back that up.

Brauhaus Sion
Similar in age to Gaffel, Sion was founded in 1318 but survived through the world wars intact. Their Kölsch had more of an earthy, herbal hop aroma than the others; the hop flavor was a bit different as well, being a bit peppery (but not spicy). Sion's Kölsch was low in sulphur and a bit "tangy" but low in acidity. Some Kölsch brewers use a little wheat in the grist, and Sion is one of them.


Peter's Brauhaus
Peter's is an interesting brewery, as they brew a pretty broad variety of beer. Though 95% of what they brew is Kölsch, they also make Altbier, pilsner, festbier, and a weizen. We didn't have any of those, though, and I'm not even sure they serve them at the brewhouse. We went to Peter's twice on our trip and had two entirely different experiences. The first night was subdued and laid back; the second time around, we were crammed into this little tasting room that seemed to keep getting more & more crowded. I remember crawling over a table just to get out.

I really enjoyed the beer (less so the 2nd time around, but only because I'd tried more Kölsch by that time and preferred others more). It had a mild floral hop aroma and had a bit more hop bitterness than some of the other Kölsches we had but still retained a solid malt/hop balance.

Malzmühle
In the 13th - 15th centuries, brewers made their own malt and would sell excess malt in the city center for regional breweries and homebrewers. The brewery located at that malt market is creatively named Malzmühle (malt mill), and we stopped in for a tipple.

Like the others, Malzmühle's Kölsch was a bit sulphury but also had a touch of green apple - likely from acetaldehyde. The pils malt sweetness was a bit dominant in this one and the hop bitterness was restrained. The finish wasn't quite as refreshing or dry as I'd hoped and I left this brewery unimpressed.

Päffgen
We were near a now-defunct brewery (zur Täsch) that serves as a beer bar, so we stopped in to try some Päffgen Kölsch (I'm getting a little tired of all the umlauts now). This place was a trip, as the decor inside all seemed to be from Gothic cathedrals.

Later on in our trip, we went to the actual Päffgen brewhaus and enjoyed it even more. The brewhaus is gigantic and full of different rooms. We went in late afternoon and the place was already packed

I really enjoyed Päffgen, though, and wish we could get it in the US. The lightly-sweet pale malt character shone through, but was met with a reasonable amount of hop bitterness and floral flavor & aroma. It was a perfect combination of tartness, malt sweetness, noble hop bitterness, aroma, & flavor, and a touch of sulphur in the nose. This quickly became one of my favorite beers of the trip...

Dom Kölsch
... and then we went to Dom.

Light sulphury aroma met by noble hops and faint pils malt breadiness. Flavor wasn't malty-sweet at all (finally!) and the finish was actually reasonably bitter and dry. It had a little bit of malt sweetness at the end, but really the balance was toward the bitterness of the hops used.

We ended up coming here twice and enjoyed the beer just as much both times. This became the most-liked Kölsch for both of us. And despite Dom being one of the largest Kölsch brewers in the country, their beer is, unfortunately, not available in the US.


Reissdorf
But one Kölsch that is available in the US is Reissdorf! (Pronounced "RICE-dorf") When you think of Kölsch, this is possibly the brand that comes to mind. And while it wasn't our most favorite we had on our trip, it was still quite delicious, and fun to drink at the brewhaus.

Like Gaffel, the Reissdorf brewery was obliterated during WWII. It was rebuilt and brewing again by 1948, making several beers in addition to the Kölsch (such as pilsner & a dark lager).

I thought the aroma of Reissdorf's Kölsch was fantastic. Just a touch of sulphur, but in the forefront were the pils malt & floral hops... and unripe pear. I am not a fan of the fruitier Kölsches, and this was one of them. While the fruitiness & sweetness were not overwhelming in the least, they just led me to enjoy the Kölsch a bit less than those that had a sharper character to them (more hop aroma & bitterness, more sulphur).

That said, as I've been writing about Köln, I've been craving some Kölsch - and Reissdorf is available here in KC. You can get it on tap at Flying Saucer & Grünauer - and if you ask nicely at Grünauer's Wunderbar, they'll even serve it to you in a glass that's similar to a Stange. (I asked if they served Kölsch in a Stange, thinking they'd laugh at me, and instead I got my beer in a cylindrical glass! I love those guys!) Of course, you can get Schlafly's excellent Kölsch-style ale, but if you want a Kölsch from Köln, Reissdorf's is probably the most accessible.

Sünner
For our last dinner in Köln, we had mussels at a place called Bier Esel, which is apparently famous for them; they also serve Sünner Kölsch, which we hadn't yet tried. The Sünner brewery was destroyed in WWII, but like others, was rebuilt and brewing again. I found their Kölsch to be a bit too sweet, however, and didn't care too much for it. The hop aroma & bitterness were quite subdued, and instead the balance was toward pils malt & a moderate amount of apple-like fruitiness. Not my favorite.

The Verdict
I had a wonderful time trying all these variations on Kölsch. We tried beers from nine Kölsch breweries, a little more than a third of the number of breweries allowed by the Konvention to call their beer Kölsch. And here is how we ranked them. Both John and I came up with our individual lists and as it turns out (perhaps not surprisingly), that we ranked them in the same hierarchy.

  1. Dom
  2. Gaffel
  3. Päffgen
  4. Peter's
  5. Sion
  6. Reissdorf
  7. Sünner
  8. Malzmühle
  9. Früh

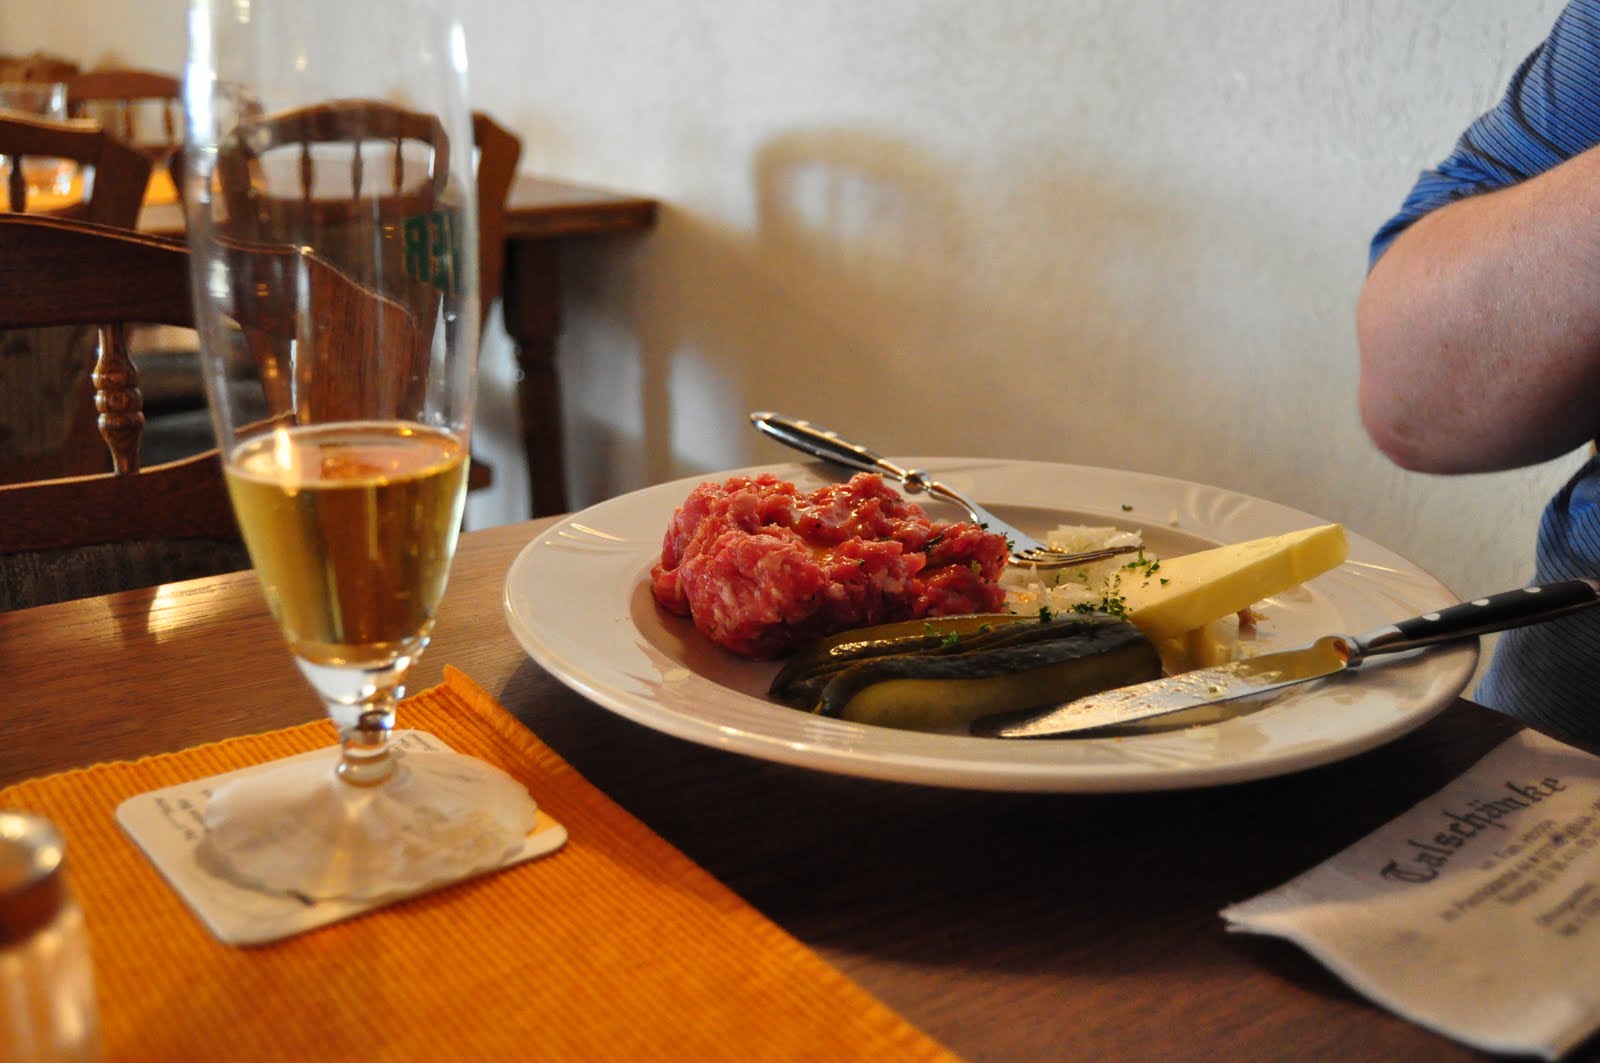
Next up - the food of Köln.

Wednesday, September 14, 2011

Part 8a - Köln & the history of Kölsch


After our day in Düsseldorf, we drove half an hour to what would turn out to be my second-favorite city on the trip, right after Prague. Köln was beautiful and the architecture interesting.  And the brewing history there is just about as fascinating. Probably most notable is that the Köln brewers have organized in various forms for over 700 years as a way to protect their industry from governmental interference, black-market brewers (those damn homebrewers!), and external competition.

Kölsch wasn't a style until recently; it's a relatively new style whose form as we know it today is less than 100 years old. It wasn't even a prominent style in the city until after WWII. Its predecessors, though, have an interesting history. Gruit (beer bittered with herbs) was the prominent style in Köln up through the 1400s. A heavier, maltier beer bittered with hops called "keutebier" from the north started gaining popularity around that time, but the Köln breweries disallowed production of this style as a way to protect their products. At the same time, taxation on beer was based on the strength of the beer and new taxes on hops were introduced; this heavy taxation solidified Köln brewery resistance against brewing keutebier. In 1495, however, brewing gruit became illegal and breweries turned to making a lighter version of the popular keutebier to stay in business while avoiding high taxation.
Köln cathedral at night

In the 1800s, when the indirect heated kiln was invented and maltsters were able to kiln malt at high temperatures without heavily roasting or smoking the grains, brewers started making a pale, hoppy, unfiltered pale ale called "wiess" ("veess"... rhymes with "fleece"). Filtered, they called it Kölsch. And a style was born.

Fast forward through French occupation and their dissolution of the brewers' guilds, two world wars, the destruction of several of Köln's breweries, commercial competition, the loss of most of the city's brewers, quickly-expanding love for Pilsners across Germany and Europe, and you have a pretty big threat to Köln's identifying brew. Rebuilding Köln's brewing culture took a few decades, but included the emergence of the Association of Köln Breweries and the Köln Brewers Corporation. In 1986, the Kölsch Konvention declared Kölsch the official beer of Köln and protected it under an appellation. That's why you'll often see "Kölsch-style ale" (rather than "Kölsch") on beer made outside the Köln area.

So with its origins in gruit, keutebier, and unfiltered wiess, we now have Kölsch. We'll get into its modern incarnation next, and I haven't really done the style justice, but I find its history interesting. If you want to find out more, check out Eric Warner's book on the style.

And next... on to the beer itself and some of the breweries that make it.

Monday, September 12, 2011

Part 7: Düsseldorf

I was going to write about Düsseldorf and Köln in one post, but there's so much to say about each of them, that I've decided to split them into two separate posts. Düsseldorf is home to Altbier, a German ale that's typically known to be fairly nutty & moderately bitter. Our time in the city of Alt, though, proved to us that Altbier is a widely-variable German ale that ranges from nutty & bitter to moderately malty-sweet & floral. If you think about the amount of variation in American Pale Ales, or even IPAs, you get a comparable amount of variation in German Altbier.

Cask at Schumacher
One of the images I remember most from this trip are the casks in various bars. Bamberg's breweries used them, as did those in Düsseldorf (and Köln, which is up next). Some people have this bizarre notion that German beer is served warm; I suspect that comes from the fact that it's not served at "Coldest Beer in Town!" temperatures. Despite that, it's still served plenty cold, but more like cellar temperatures (low 50s). Perfect for being able to smell and taste your beer.

There are several Altbier breweries in Düsseldorf , and we did our best to check out the most notable. Here's a run-down of where we went & what we thought:

Brauerei Schumacher
Very clear, light brown/amber in color. The aroma was sweet, nutty, toasted malt with a bit of doughiness and a floral hop aroma toward the end. The flavor was prominently toasted nuts and bread, with a bit of a floral hop flavor but lingering bitterness in the finish. I was really surprised at how bitter this beer was; it was one of the bitterest beers I'd had on the trip, but the malt character balanced it out some. Even still, this was - surprisingly so - quite a bitter beer.

Zum Schwartze Maus
We walked about 4 miles from Schumacher to Schalander, only to find out that Schalander was closed. So, we found this place across the street that served a couple of different alts. I tried the Frankenheim Alt which, as you can probably tell from their website, is a bit... commercial. It was pretty sweet and presented brown sugar & caramel right away. It almost had a sweet "Ricola" type of malt character that gave way to a toasted almond presence. The hop bitterness was subdued and certainly not in balance with the malt. I wasn't impressed.

Hausbrauerei zum Schlüssel
After a convoluted tram ride from the black mouse pub, we stopped in zum Schlüssel to rest our feet and revive. As you can see in the picture, alt is served in the little cylindrical glasses; they're all about .2 or .25cl. I love this, because I so often want smaller servings of beer, just so that I can taste different beers. But when the place offers one beer, it's kind of an annoyance... but anyway...

This one ended up being one of my favorites. It was very nutty, likely from the Munich malt, and quite bitter - but not as bitter as the alt at Schumacher. It had some spicy hop notes at the finish, adding to the complexity. I really enjoyed this beer; it had a fantastic balance of malt sweetness & toast, hop aroma & flavor, and bitterness in the finish. I'd love to have this available in the US.

In the picture, you can also see the small gray crock in the background. Every single bar & restaurant in Düsseldorf we went to had these on the table. One would hold flatware, another held mustard. I should have bought some of my own. You can't have enough mustard.

Zum Uerige
This place was insane. You probably recognize the name, and it was largely a tourist attraction. However, it was clear they work hard not to turn it into the ridiculousness in places like U Fleků. And, as it turns, out, they had my favorite Altbier of all the alts we tried.  The malt character was a bit more complex than the others we had. While it definitely had the toasty Munich malt notes, it must have also had a decent amount of crystal malt in it, lending a bit of caramelly sweetness. You got that initially, but each sip ended with a spicy - and slightly funky - hop flavor with moderately high bitterness.
They keep track of how much you drink by marking your coaster.
Is this because the glasses are so bitsy?

We're coming up to Sticke release time (every October & January), so we should start seeing fresh bottles on shelves of our liquor stores here in KC in the coming months. I'm quite curious about their distilled Stickum (moreso, Stickum PLUS), but haven't seen it here... if you have, let me know where you spotted it.

Funny story about this place; their servers are notorious for being a bit impish. I went to the restroom during our visit, and on the way back to our table, our server fake-punched me in the stomach. German flirting at its finest? Not sure, but it did make me laugh just because it was so off-the-wall. Wacky Germans...

Im Füchschen
This place was a short walk from Zum Uerige, so we stopped in for a small beer (remember, these are 20cl pours of 4.5% ABV beer, which is slightly weaker than 6oz of Boulevard Wheat at a time). Their beer was super-nutty with a scant amount of floral hops. There wasn't much bitterness in the finish at all, which made it very drinkable but also relatively uninteresting. We had one beer and left, but not before noticing that their food menu featured steak from Nebraska.


Overall, here is how I rated the alts we tried, from best to ... not best:
1) Zum Uerige
2) Hausbrauerei zum Schlüssel
3) Schumacher
4) Im Füchschen
5) Frankenheim

It's a good thing, then, that we can get what I thought was the best one here in KC. Granted, it's almost impossible to find the original altbier, but the Sticke is fairly available, and we do get it seasonally.

I told you I had a lot to say. :)

Saturday, September 10, 2011

Part 6: Dortmund

After we left Wöllnitz, we drove across the German countryside to the Dortmund/Düsseldorf/Köln area, stopping in Dortmund for a night's stay before a couple of days in Köln. Dortmund was cute, but nothing too remarkable or notable. We went to the city center for dinner and ended up in "Zum Alten Markt" ("at the old market") that was like a German version of Old Spaghetti Factory. Kitsch everywhere, gigantic portions of mediocre food, and slow service. Its saving grace was the beer, but even then I didn't mind leaving.
Bird cages hanging from the ceiling of Zum Alten Markt.
It was just missing the streetcar in the middle of the restaurant.

We crossed the square to a place called Brinkhoff's and enjoyed a house beer (eh) and a delicious Czech black lager called Krusovice Cerne. Like others we tried in Prague, this one smelled and tasted a bit of plums and dried fruit, but was still light-bodied and easy to drink. There was a touch of roast & coffee in the finish thanks to the dark malt. There aren't a ton of black Czech lagers you can get here, but Bernard Cerne is fantastic - and easily available in KC (at least at Royal, anyway).

Pilsners in this area come in stemmed glasses - not what we know as pilsner glasses - with paper doilies.
I could have sworn I'd read that you could get Dortmunder Export at Zum Alten Markt, but apparently I remembered wrong. Your best bet at getting a Dortmunder Export in the US is going to be via Ayinger's "Jahrhundert" beer, or Great Lakes' Dortmunder Gold (for which you'll have to trade or travel).

Bottom Line - the best beer I had in Dortmund was a Czech beer. I'm sure others have different experiences, but I found most of the local pilsners to be flabby and unremarkable. Pilsner malt graininess, mild hop bitterness, floral hop aroma, and light residual sweetness; nothing outstanding but nothing horrible. Not that I was ungrateful to be there; it just paled in comparison to the other cities we went to. But, the mediocrity was short-lived, as the next day we headed off to Düsseldorf and Köln for some Altbier and Kölsch .

Friday, September 9, 2011

Part 5: Wöllnitz

I haven't written about our Germany trip in months, and I'm determined to finish this bad boy. Let's do this.

After our evening in Leipzig at the Ohne Bedenken, we trekked out to find packing material for transporting our beers. The plan was to buy a box, tape, lots of bubble wrap & packing peanuts, and check the box as luggage. After a lot of searching in a big mall, we finally found a box, but no packing materials. Batting and fake-snow fluffy stuff from the Christmas decoration section would have to do. We also found some cheap-ass cherry mead (3 for a 750ml bottle - and it was actually pretty good!) and entertained ourselves with the flat escalators in the mall.
Despite the best engineering intentions, shopping carts are difficult to hold in place on these things.

With our purchases in tow, we headed toward Wöllnitz, which John had read about on Ron Pattinson's blog. Incidentally, on the way to Germany, we also read Stan Hieronymous' "Brewing with Wheat" where he  mentions this city's unique style of beer. Gasthausbrauerei Talschänke brews a sour wheat beer there, called Wöllnitzer Weißbier. Beer Advocate & Rate Beer list this as a Berliner Weisse, but it's actually a derivative of an old style called Lichtenhainer - a sour wheat beer made partially with smoked malt.
Smoky sour wheat beer in Germany

The aroma was bready and very citrusy, like a lemon sherbet, with a very faint floral hop aroma at the finish.  The flavor was also citrusy, but not so much as the aroma was. The finish was smoky and bready; the wheat in the grist contributed to a light graininess that complemented the citrus character well. We both thoroughly enjoyed it, but I have to admit...

... I liked the Jever better. A very bitter German pils, Jever on tap is something to behold. You can get something sort of close to Jever at Grünauer by ordering a glass of Czechvar, but it won't be nearly as bitter or delicious.

And speaking of delicous? Hackepeter! Take raw pork, add some fresh onion, a raw egg and some spices, toss it on a plate, and voila - deliciousness on a plate. My mother would die knowing we were dining on a plate of raw pork & raw egg, but I am starting to believe that cooking meat ruins it.

A bit of Jever next to some Hackepeter, a pickle, and a giant wedge of butter
It's a regional specialty, and we ran into a variant of the raw pork delicacy in other cities... but first? Dortmund.

Wednesday, August 3, 2011

And Speaking of Firkins in Kansas City...


A couple of weeks ago, I was whining about Kansas City’s poor state of affairs when it comes to beers in a firkin around town. I was pretty damn happy to, soon-after, read on the KC Beer Blog that Blanc is considering doing cask beer from time to time (sounds pretty tentative, but at least they’re actively considering it).

So I’m excited to hear that the next Rare Beer Night at Flying Saucer (Aug 4th) will feature a firkin of Tallgrass’ “Dream Warrior” - Halcyon with strawberries & vanilla. If you haven’t tried regular Halcyon yet, you’re missing out on a fantastic summer beer that’s light, citrusy, and far less embarrassing to order than a similarly-refreshing radler. I can’t guarantee that asking for a glass of strawberry-vanilla beer won’t be embarrassing, but maybe that’s why they named it Dream Warrior (am I the only one picturing Game of Thrones imagery?). It sounds delicious.

Sunday, July 31, 2011

Bourbon Cerise

I love Founders and nearly everything they distribute to Missouri. I also love quality-made fruit beers like BBQ, WI Belgian Red, or Sam Smith strawberry ale. A couple of years ago, I had the opportunity to try Cerise, and I found it a bit over-fruity and sweet, even though I'm a fan of super-sweet fruit beers like Belgian Red. I haven't had it since, mostly because it was just too... fruity.

A couple of months ago, I decided on a whim to get into bourbon. I bought a couple bottles of bourbons I read about online and absolutely fell in love with Eagle Rare 10. Fast forward a month or so, and I'm in Royal liquor looking around for something to drink. I picked up some saisons from Jolly Pumpkin and Stillwater, as well as a 4-pack of Founders Cerise (hoping that perhaps my memory had failed me). When I got home, I drank half a bottle of Cerise and wasn't that impressed.

So, I added about a quarter-ounce of bourbon to that last half of a bottle... and loved it.

Founders needs to barrel-age Cerise. While I'm happy to add an ounce of bourbon to a bottle of Cerise, the oak and bourbon would add significant depth. Without a doubt, cherries, oak, and bourbon are a match made in polyamorous heaven.

So if you find yourself with a chance to drink a bottle or glass of Cerise - or if you are interested in trying the beer with some complexity - get a shot of bourbon to go with it. You won't regret it.

Wednesday, July 20, 2011

Engine & Cask

We took a trip to Chicago earlier this year for a homebrewing competition as well as a long weekend getaway. Among some of the typical places we wanted to hit (Map Room, Publican, Goose Island Clybourn), we had our sights set on Owen & Engine. We wouldn't have known about this place had it not been for Elliot (from Waldo Pizza) moving to Chicago and getting a gig there as the Beer Manager. We ran into him last fall and he mentioned the place to us. We couldn't wait to check it out.


Owen & Engine
Photo from Metromix Chicago
There were several reasons we wanted to go (one of them being the stellar British-inspired food menu), but the main one was for the beer engines. They've got four of them set up behind the bar, each with carefully-selected beers available. The place also has 20 separate taps at the bar, again all thoughtful and representing a wide variety - everything from Rodenbach Grand Cru to Bitburger, cider, and Cafe Negro. We had a great time trying a bunch of the beers on engine, as well as those on the standard taps and I recommend stopping here any time you're in Chicago.


I'd really like to see more places in Kansas City offer beer on engine (whether cask or keg), or even gravity-fed from a cask. A few bars around town do have engines, but they’re rarely ever in use. And while beer on engine can be kegged with CO2 gas maintained at a low level to keep a blanket over the beer, it’s the beer in a cask that is really something unique (ever try an IIPA on cask? Amazing difference between its kegged counterpart!). But its shelf life is short, and the last time I did have something from cask here in town, it had oxidized beyond salvation. It seems we just don’t have enough interest in beer on engine and/or cask to really make it worth the bar’s time or expense.

However, it looks like St Louis is experiencing a surge of attention to cask beer. iTap introduced its cask program this spring:  they purchased empty casks and now send them off to various breweries to be filled and returned. And STLhops.com just announced that Lohr Distributing recently purchased casks for a similar program catering to multiple bars in the STL area.

If the KC beer scene keeps moving forward as it has in the past 2-3 years, it’s only a matter of time before we start seeing a revival of cask nights and dusting off the ol’ beer engines. I hope.

Friday, July 15, 2011

Great Nebraska Beer Fest 2011

What are you doing the weekend of August 27th? Consider going to Nebraska.

The Great Nebraska Beer Fest 2011 is going on that Saturday from 1-6pm and is held in the parking lot where Nebraska Brewing Co is located. Tickets are $30. Not convinced? Check out the flyer and this (long) list of breweries...
  • Nebraska Brewing Co
  • Twisted Pine
  • Cigar City
  • Raccoon River
  • Crooked Stave
  • Grimm Brothers
  • Crow Peak
  • Granite City
  • Stevens Point
  • Great River
  • Avery
  • Upstream 
  • Thunderhead
  • Empyrean
  • Lucky Bucket
  • Gottberg
  • Funkwerks
  • Spilker
  • Schilling Bridge
  • Free State
  • Crabtree
  • Freetail
  • Madhouse
  • Peace Tree
  • Tallgrass
  • Summit
  • O'Dell
  • Sprecher
  • Left Hand
  • Boulevard
  • Boston Beer Co
  • Breckenridge
  • Tommyknocker
  • New Belgium
  • Weyerbacher
  • Great Divide
  • Ska
  • Boulder
  • Schell's
  • Rock Bottom
  • Goose Island
There are a lot of phenomenal breweries represented here, many of which don't distribute to our area. Looks like it'll be a good event to attend. And unless you're a New Yorker, you know Nebraska really isn't that far away.

Tuesday, July 12, 2011

Sour Beer Week at the Saucer

As you can probably tell, I've lost a lot of steam in the world of blogging. Work travel has nearly taken over my life, but I've also become a lot more invested in other hobbies & time-consuming things of late. And with KC Beer Blog doing such a great job at covering all things local these days, they make it hard to come up with unique content. Not a bad thing, of course!

However, I received a press release from Flying Saucer today that I can't ignore. SOUR BEER WEEK will be taking place at the end of this month, and there are some fantastic breweries being represented. Monday starts it off with a Goose Island dinner (about which you can find out more on Facebook).

And, as fate would have it, I'm going to be traveling on business for most of that week. Hopefully there will still be some good beers left on tap when I get into town. I may have to stop in on my way home from the airport Thursday, as I'm not sure how much of the Cantillon will last. Then return Friday for Jolly Pumpkin night.


I've been thinking for a while about voting Jolly Pumpkin one of the best breweries no one in KC seems to be talking about much. If you've never had their beer, you owe it to yourself to make the trek to the Saucer on the 29th. As well as pretty much every other night that week.

Thursday, June 23, 2011

Swagger adds Sunday hours & a breakfast menu

Bull E Vard just announced Swagger’s food pairing & beer tasting event tonight with Royal Liquor. Sounds like a great way to do a beer/food pairing without forking over a lot of cash or guaranteeing a food coma.

But what I really came here to post are two other things going on at Swagger. They’re now open on Sundays, AND they’re serving breakfast on weekends! I’ve been waiting for a while for the Sunday hours, as it seems every time I get the urge to go to Swagger, it’s on Sunday. We even walked a mile with some friends one Sunday to go to Swagger for lunch, only to find they were closed (and as we walked away, someone else drove up and tried to go inside.) You'll be able to get your Swagger fix on Sundays from 7am - 9pm.

As for breakfast, it’ll be served both Saturday & Sunday from 7am to noon. No booze served prior to 9am, but I’m not sure anyone will be crying into the biscuits & gravy over that. 

Sunday, May 15, 2011

BYOB TV

In case you're feeling nostalgic for beer-related television after the questionably-permanent end of Brewmasters, or if you're dying to add just one more reality-tv show to your addiction, check out BYOB TV over on kofytv.com. The content is homebrewing-related, but entirely relevant to non-homebrewing beer fans as well. And, it's simply entertaining. It's in a reality TV format, meaning there are teams that face a variety of challenges and, toward the end of each episode, potential elimination from the show. At the end of the season, the team left standing will receive a trip to the Pilsner Urquell brewery in Plzen. Not too shabby!

If you've ever listened to Brewing Network's Sunday Session, you'll likely recognize host Justin Crossley and "Director of Difficulty" JP. The first episode starts out with a quiz show style game, where competing teams answer questions about beer, perform taste tests, and guess hop varieties based on aroma. The teams then move on to timed challenges hooking up brewing equipment and finish up with a relay race involving mugs of beer and spent grain. Two of the eight teams were eliminated, with the remaining six going on to episode #2.

Episode #2 kicks off with the six remaining teams making different batches of beer, including a squash-sage beer, one with meyer lemons, and an oatmeal-raisin-cookie beer. But there's a twist that gets introduced, making the challenge even more challenge-y (and you have to watch the episode to see what it is). A judging panel chose to move five of the six teams on to episode #3, sending one team home.

And, finally, the most recent episode's challenge was to build an all-grain homebrew setup from junk. As with most reality shows, a bit of drama occurs within the first ten minutes but all was made right with a bit of compromise. This ended up being my favorite episode; I loved the sprinkler attached to the inside of the cooler-MLT lid for sparging, as well as the terra cotta pot as a false bottom.

Only four teams remain after this episode, and the next one available (aired May 14th but not yet online) involves the teams having to clone a Lagunitas brew. The show's well-made and engaging, and I laughed more than a few times. Happy viewing!

Monday, May 2, 2011

Big Brew Day

National Homebrew Day is this coming Saturday (May 7th), which means that homebrew clubs nationwide will be hosting Big Brew events. Big Brew is an event where homebrewers gather to make homebrew, share knowledge, answer questions, share love for the hobby, and... drink beer. The American Homebrewers Association (AHA) publishes recipes each year, and this year's are an 1800s style East India Pale Ale, a Wit, and a Robust Porter.


Basically, you show up and talk beer & homebrew while brewing, helping brew, or watching someone else brew. If you're interested in the hobby but have no idea where to start, this is a perfect opportunity to get answers. We've got a few Big Brew days in our neck of the woods put on by a few clubs. Be sure you're there by noon (if not sooner), when a nationwide toast to homebrewing will take place.

  • The KC Bier Meisters will, as in years past, host Big Brew in the area behind Bacchus & Barleycorn. Festivities start at 10. More info is on the KCBM website.
  • ZZ Hops' Big Brew day will be in Lee's Summit, also starting at 10am. See their Facebook page for when, where, and contact info.
  • Jayhops has contact information on their Facebook page as well, if you'd like to attend.
Cheers! And happy homebrewing.

Friday, April 29, 2011

Making Mead - Part Five

So here we are, the final post in my little series on meadmaking. I'm not a pro, I haven't won meadmaker of the year, and I won't claim to make the best meads I've ever had. But, despite that, I've learned a lot of information over the past 1.5 years that has vastly improved our meads - and one is going to compete this June in the AHA National Homebrew Competition. I've compiled a bunch of resources here to help get you on your way, including where you can find good examples of commercial meads.


Honey
55 pounds of sweet goodness
You can buy honey at any of our local farmers’ markets, but you’re going to find that wildflower & clover are the two types of honey available locally. For varietals such as tupelo, basswood, mesquite, or orange blossom, you’re going to need to find a non-local source. (That said, when Trader Joe’s finally opens up here, you’ll be able to get Mesquite honey there.) Some of the honey providers I’ve used, and that others recommend, are:


Tools
I’ve mentioned a few key tools in these posts, but here are the links to them again. Obviously, the standard fermenter, blowoff assembly, hydrometer/refractometer, and other standard brewing tools apply here too.
  • Lees Stirrer: In addition to your fermenter, you will definitely want to pick up a lees stirrer to mix & degas your must.
  • Postal Scale: Measuring out your honey is made easy with a postal scale; I bought ours on Amazon and am completely happy with it. I also use this when shipping off beers to homebrew competitions. Sign up for a free account on UPS or FedEx’s website, and you can print out shipping labels after entering destination & weight information online. All you have to do is drop off the package with your label in an affixed pouch; no waiting in line.
  • Gram scale: I also recommend getting one of these to measure out your nutrients and yeast. It’s also really handy for measuring hops.  
  • pH Strips or Meter: pH is so important to meadmaking, you really need to measure it so that it can be adjusted as necessary. The most economical approach is with pH strips, but I recommend investing in a pH meter. You’ll need to calibrate the meter on each mead day (assuming you’re making it less frequently than every few days), so pick up some solution at the same time. Don’t forget the storage solution as well, which will keep the little probe from drying out.
  • Mead Calculator: This is such a handy tool for helping you figure out how much honey, water, and other fermentable ingredients you'll need for your batch.
Mead Resources
As I mentioned a few days ago, everyone finds their own approach. What I’ve laid out here is the method we’ve figured out by gathering information from the interwebs, attending NHC, talking to other meadmakers, reading books, and experience. I recommend checking out some other mead resources to see what others are doing and get a different perspective – as well as inspiration. Here are just a few -


Advanced Information on Mead
I'm not even going to try to describe the plethora of information on the BJCP mead page, but please check it out. There is so much good information there, it's a necessary resource for any meadmaker. From information on varietal honey to punching down fruit caps in melomels, to styles, to troubleshooting, you'd be hard-pressed not to find what you're looking for here. This is an incredible source of information on making mead.

Commercial Meads
Winner of a well-deserved gold medal
We can get a handful of meads here in Kansas & Missouri, and I've found the widest selection, all on the Missouri side, at Gomer's Midtown, Royal on 103rd, and Lukas in Martin City. They're typically located with the port & sake, but you might have to ask if you don’t see it. Some brands you're bound to see:

  • Redstone (CO) - makers of some of the best commercial mead I've had. They make a hopped mead.
  • Chaucer's (CA)
  • Pirtle (MO) - I highly recommend their blueberry & effervescent meads. The effervescent just won a gold medal for traditional sweet mead at Mazer Cup! Typically stocked in the Missouri Wine section.
  • Honeywood (OR)
  • Lurgashall (England)
  • Bunratty (Ireland)
  • Makana (S Africa) - they make a great bird's eye chili mead

There are some fantastic meaderies cropping up all over the country, though. Some of the greats include

  • B Nektar (incredible meads out of IN)
  • Rabbits Foot (CA; they make several braggots)
  • Heidrun (CA; fantastic sparkling meads using méthode champenoise)
  • New Day (IL)
  • White Winter (WI; one of my favorites)
  • Mountain Meadows (CA)

I'm sure I'm forgetting some, but that should get you started.

I haven’t really talked about it, but Polish mead is a somewhat different beast and one I have yet to see here in the KC metro. I know you can find some in St Louis at the Wine & Cheese Place; the traditional bottles are pretty easy to spot. Polish mead typically comes in four strengths: 2:1, 1:1, 1:2, and a 1:3 honey:water ratio. Most are aged on wood for 1-4 years (some are aged up to 25 years), and contain fruit or herbs. The resulting product is a sweet but smooth and rich beverage that is notably high in alcohol. It’s definitely worth trying once (or more).

You can order from many of the meaderies directly, which is probably going to be your best bet since online wine retailers really only tend to carry Chaucer's. Since KS state law doesn't allow direct shipment of alcohol to households, you’ll need to have it sent to a location in Missouri (my house, for example).

I hope you found this information helpful and inspiring. If you’re interested in meeting and talking to other meadmakers, there are a few homebrewing clubs in the KC metro area with members who make mead: KC Bier Meisters, Lawrence Brewers Guild, ZZ Hops, and Jayhops.

Thanks for reading!

Reference - 
part one
part two
part three
part four

Wednesday, April 27, 2011

Making Mead - Part Four

In the past three posts, we've gone through getting ingredients, mixing them, and going through fermentation & staggered nutrient additions + degassing. Mead fermentation should take about 3 weeks, give or take. We usually give it a month or so to get to our final gravity and let as much yeast fall out as possible. Once fermentation is done, there are a few things you can do:

- Make it sweeter
- Make it more acidic
- Make it more tannic
- Modify the flavor with additional ingredients
- Clarify the mead

Backsweetening
Unlike beer wort, honey is pretty much completely fermentable and your mead may end up a bit dry. Unless you arrest fermentation before it finishes by racking off the yeast and adding stabilizers (an approach I don't trust at all), you'll probably want to add back a little honey to bring out some of the original honey character as well as increase the mouthfeel. If you add more honey to your brand new mead, the yeast are just going to consume it. So, you need to add stabilizers before doing anything else. 

Adding campden tablets (potassium metabisulfite.. yeah, yeah, sulfites, blah blah) will hinder any wild yeast in your new mead, as well as help prevent oxidation during transfer. At the same time, adding potassium sorbate will prevent further fermentation by hindering yeast reproduction. I recommend transferring to a new container in this step, so that you get your mead off the sediment to aid clarity. For each gallon of mead you're about to transfer, add 1 crushed campden tablet and 1/2 tsp of potassium sorbate per gallon to your new container. Then, transfer the mead, give it 1-2 days to stabilize, then add any sugary additions without concern of triggering further fermentation. 

Adding 1/2 - 1 cup of honey (half a cup at a time) to a 5-gallon batch will usually give you the sweetness you're looking for and will greatly enhance the natural honey aroma that's highly desirable in a mead. If you added fruit in primary, you could choose to add juice at this point as well. More than a cup of honey for a 5gal batch is often quite cloying, but really it's up to you. You're best off boiling 1-2 cups of water, pouring it into a sanitized bowl or pitcher, and adding the honey to the hot water. This will make the honey pourable, thin, and easily mixable. 

Once transfer is complete, top off with a blanket of CO2 if possible to prevent further oxidation. If that's not possible, you can sanitize a bunch of marbles and put them into the fermenter to decrease headspace. Or, add water. Or, transfer to a smaller container.

Creating Balance
BJCP Banquet at Summit Brewing Co
Last year at the National Homebrewers Conference, we attended the pre-conference BJCP banquet where there were tables set up with tinctures & mixtures of various mead additions. These included extracts of mint, juniper, ginger, cinnamon, rose petals, and other flavoring additions. There was also a table set up with tannin in liquid and a variety of acids (including an acid blend). We were given cups, mead on tap, and free reign to blend at will. This was one of the many eye-opening experiences I had at NHC last year. It's quite an experience to taste a good mead, add a touch of acid and tannin, and realize how much the already-good mead can improve with a bit of blending. The flavor "pops", the finish becomes cleaner, and it becomes dangerously more drinkable.

Creating Multiple Meads from One
This practice of using extracts convinced me that making metheglin (herbed mead) does not involve adding herbs or spices to the fermenter, but is better off done by creating extracts of ingredients that are then added in small amounts to the base mead. Doing this is simple - soak the desired ingredient in cheap neutral alcohol to create an extract. Then, after a couple of weeks, pour a small amount of traditional mead (2oz or so) into several containers and add varying amounts of the extract to each container with an eyedropper. Figure out which one is most appealing, scale up, and voila - you now have a different mead. Try it with clove, orange peel, chili peppers, cinnamon, vanilla, or anything else you can think of. Another idea? Make a hop tea and add that to your mead. 

Better yet, dry-hop! If you dry-hop in a keg, pick up a Sure Screen. It goes right onto the end of the dip tube and makes racking off the hops so much simpler (unless you get hop cones somehow wedged under the tube, causing the beer not to siphon through the transfer tubing, requiring you to have to scoop out and stir a bunch of hops to try to dislodge the cones and generating a huge mess and a lot of swearing - and potential oxidation - in the process. Good times.).

Clarifying Mead
There are two main processes for clarifying mead: wait several months or use a clarifying agent. We're impatient, so we clarify. Alberta from Bacchus & Barleycorn recommended Super Kleer KC one day, so I gave it a shot - and I haven't turned back since. The packet is composed of two pouches; after pouring the contents of the first pouch into your mead, you wait an hour and pour the contents of the second pouch. Give the mead a gentle swirl and wait a few days. After a week or so, your mead will be very clear. After three weeks, it'll be brilliant. I can't recommend this stuff enough and consider it a standard part of every mead batch we do.

After clarifying, package. We keg all our meads, but a lot of people will bottle them & age for as long as it lasts. Mead, like wine, will change as it ages, and almost always for the better. If you take care of fermentation and practice good sanitation, you should be able to enjoy your mead when it's less than 6 months old. The old philosophy of having to age meads for at least 2 years can get tossed out the window. 

In my next (and last) post on meads, I'll list out some of the best resources I've found for meadmaking (ingredients, tools, and information) as well as some of the better meads I've discovered - and where to find them. Unfortunately, our selection of commercial mead is relatively poor here in KC, but we're lucky to have a meadery in Weston as well as the option to have mead mail-ordered (in Missouri).

Reference - 
part one
part two
part three

Tuesday, April 26, 2011

Making Mead - Part Three

Picking up where we left off in part two, we’ve now got two meads that are starting to ferment. Up to this point, all we’ve done is mix ingredients together. Of course, every meadmaker’s process is going to differ in some way. Some meadmakers heat their mead must on the stove, some even to the point of boiling (not to be confused with burnt mead, which is mead that is slowly boiled for several hours to develop complex caramelization). These posts are just one way to approach making mead; certainly, if you make your own, you’ll find your own approach. One thing is certain, however – a healthy fermentation is key, and there are some things you can do to promote one.

Managing your Fermentation
The first few days of fermentation are crucial to making quality mead. During this time, the yeast need a nutrient-rich and yeast-friendly environment to properly and fully ferment the sugars without creating problematic off-flavors and fusel alcohols. A lot of people will say that you have to age mead a few years before it’s even drinkable, but that’s likely because the fermentation didn’t go as well as it could have. Of course, mead does typically age extremely well, and tends to improve over time, but a fresh young mead is certainly drinkable if you make it right.

Specifically, you need to manage the following:
- Fermentation temperature (keep it in the 68-72 range)
- The pH of your must (keep it above 3.2, ideally around 3.4 - 3.6)
- Adequate FAN, vitamins, and minerals

You can check your pH levels with pH strips or a pH meter. If you have pH strips for beer, you’ll need to buy ones that are specifically intended for wine, as the pH range will go lower than the beer strips register. They should go under 3.0. We have a pH meter that we use for both mead and beer, and I love the thing. It’s kind of a pain in the ass to calibrate every time (mostly because I'm impatient), but it’s a lot more accurate and reassuring than pH strips.

If you need to increase your pH, which is often the case because honey is moderately acidic, you can add Calcium Carbonate (CaCo3) or Potassium Hydroxide (KOH). We use KOH because it does not leave behind carbonate, which can leave behind a chalky, salty taste. We create a 2M KOH solution at home (I bought our KOH at Essential Depot) and add the solution in 10ml increments to our 5 gallon batches. Pick up an infant syringe at a pharmacy to easily measure out 10ml (it’s also a great tool for measuring out Star San or Iodophor – 6ml per gallon of water for a properly-diluted sanitizing solution). Wear gloves when you mix & measure this, as it will actually break down the lipids in your skin. Ew.

Degassing Mead
You’ll also need more DAP and Fermaid-K during fermentation, and will add these to the fermenting mead along with your pH adjustments. I learned the hard way, though, that adding these dry powders provides thousands of nucleation sites when added to the mead, causing the well-known mead volcano. You could do a 5-gallon batch in a 20-gallon bucket so that the foam doesn’t spill over the top. Or, you could degas your mead.

You, too, can have your own homemade volcano
Degassing basically removes CO2 from solution through rapid agitation of the must. Guess what we use – yep, the handy dandy lees stirrer. Some people use a whisk, others use brewing spoons, but I’m not that interested in getting a workout when I do my nutrient additions, so I use the lazy method. Sanitize the lees stirrer and the neck of your carboy and whirr away. I usually whisk for about 5-8 minutes and sometimes have to stop to avoid a mead volcano. A lot of CO2 is removed in this process and will allow you to safely add your nutrients without making a mess. Amateur video ahead... 


There’s another upside to degassing, though, and that is to lessen strain on the yeast. I’ve read that you need to degas your must because CO2 levels can become toxic to your yeast, but I’ve also read that it’s nearly impossible to get enough CO2 to a level of actual yeast toxicity. What it will do is help keep your fermentation chugging along, and remove CO2 early on so that you get a still mead more quickly than just letting it sit/age for months. 

We use the Curt Stock fermentation schedule, which requires 8 days of fermentation care as follows:
Day 0: make the mead, adding 4.5g Fermaid-K and 2g DAP.
Days 1, 3, 5, 7, and 8: Degas only
Days 2, 4, and 6: Degas, then add 4.5g Fermaid K, 2g DAP, and 10ml KOH

That's it. More involved than most beer, but still extremely easy.

Next up, post-fermentation!

Reference - 
part one
part two

Monday, April 25, 2011

Making Mead - Part Two

In my prior post, I talked about the two primary facets of meadmaking that I think contribute the most to making a good-tasting mead: yeast health and suitable honey. Of course, sanitation and proper care go without saying. This post gets into the pre-fermentation details. Most of this information is a result of attending NHC sessions last year, reading Ken Schramm's book, and going through Kris England & Curt Stock's presentation from the 2008 NHC.

A couple of weekends ago, John and I threw together three batches of mead in one afternoon – two fruit meads (melomels) and one traditional. It's so easy to put together, it's almost silly to do just one batch at a time. The most frustrating and time-consuming part of that day’s session was that our honey was fully crystalized and it took about 2 hours – and a lot of boiling-hot water – to get it to a pourable consistency (and even then, “pourable” is an overstatement; it was more like “soft enough to squeeze through the narrow neck of a gallon jug”). It’s worth noting that Tupelo & White Sage won’t likely crystalize at room temperature; in my experience (and I’m not alone), tupelo makes better-tasting mead than white sage, but sage can be a great base for fruit & spice meads as it’s quite neutral.

Weighing the honey on a postal scale
I had added a gallon of water to the carboy prior to adding honey
(the rest of the water got added once I finished with all the honey)

First, Devise a Recipe
I like using the mead calculator on GotMead.com. You can determine how much honey, juice, fruit, water, and other ingredients you need to achieve your desired mead. By playing around with quantity of honey & other fermentables while keeping the target volume the same, I can come up with amounts of ingredients to achieve my desired starting gravity. 

To know where your starting gravities should land, you can look at the BJCP’s guidelines for hydromel (light), standard, and sack (strong) meads. For instance, for the pyment I knew I wanted a mead that would be at the upper end of the standard-strength range (around 14% ABV). To know how much honey to use with 4 pounds of grape concentrate (which I know is 68 Brix), I added this in the calculator as a 2nd ingredient with 68% sugar content. With 12 pounds of honey, this brought me to just under the top of the standard category. Perfect! 

I'll pick two of the three recipes we did - one melomel (the pyment) and one traditional. Both are 5-gallon batches.

Step 1: Prepare the Ingredients
For the Traditional Mead (OG 1.115):
16 pounds of Orange Blossom honey
4 gallons of drinking water from Hy-Vee
1 tsp of Calcium Chloride to provide calcium to the must & aid fermentation
4.5g of Fermaid-K for yeast nutrition
2g of DAP as a source of nitrogen

For the pyment (melomel made with grapes) (OG 1.111):
12 pounds of Orange Blossom honey
4 pounds of Beaujolais grape concentrate (Alexander's brand, 68 Brix)
4 gallons of drinking water from Hy-Vee
1 tsp of Calcium Chloride to provide calcium to the must & aid fermentation
4.5g of Fermaid-K for yeast nutrition
2g of DAP as a source of nitrogen


Step 2:  Assemble the must
Put the water and any juices & herbs into the fermenter, then add your honey. The easiest way to measure your honey is by weight – we put our carboy on a postal scale then pour the honey into the carboy until the desired weight is achieved. Once all ingredients are in there (except for maybe a gallon or two of water), you get to the fun part:  mixing.
Before mixing

I don’t recommend doing this without a lees stirrer. I’ve done it a few times without one, and can’t believe it took me 3 batches to finally pick one up. Stirring honey into water by hand is not fun. So, do yourself a favor and get one (and a drill if you don’t have one already).
The business end of a lees stirrer
The little "wings" fan out when the stirrer is in rotation.
The wand end of the lees stirrer just goes right into your drill – sanitize it, hook it up to your drill, put it into your fermenter, and whirr away. Be careful not to scratch the bottom or sides of your plastic container. In a few minutes, your honey should be completely blended into the honey. Add the Calcium Chloride, DAP, and Fermaid-K, mix lightly, then cover your fermenter (with foil, a cap, or a lid) and go prepare your yeast.
After mixing

Step 3:  Prepare your yeast
If you’re using dry yeast, you need to rehydrate it. Sprinkling it directly onto the must can cause slow fermentation because you can end up with clumped-up yeast cells, preventing all of the cells from rehydrating and contributing to fermentation. Rehydrating with Go-Ferm will kick-start your fermentation by providing your yeasties with nutrients while they go back to their full & proper shape. Obviously, if you’re using liquid yeast, skip this step.

Fermaid-K, DAP, and Go-Ferm for happy yeast
You'll need a lot of this.

Boil some water and pour it into small containers (we use small coffee mugs, but any small container will do). You don’t need a lot of water – maybe 2/3 of a cup at most. Cover the small containers with foil and let them cool to 115 degrees (be sure to sanitize your thermometer every time you check the water temp). Once you get to 115F, add the Go-Ferm. Cover your containers again and let the Go-Ferm sit in the water while it continutes to cool to about 105F. Once you hit 105, add the yeast and let it rehydrate for about 15-30 minutes. After that time has passed (or if you’re using liquid yeast), pitch your yeast, hook up a sanitized blow-off assembly, place your fermenter in a dark place that’s about 68-72F, and you’re done!

Until tomorrow

reference - Part One

Sunday, April 24, 2011

Making Mead - Part One

I first wrote about mead a while back (wow, was it really 2 summers ago?) and have continued to learn quite a bit since then. I wrote about making a basic mead, which included mixing honey, water, and nutrients over 3 days ("staggered nutrient additions"). Since then, we've learned a few more details to help make even better mead. In short:

- Yeast health is key
- Your choice of honey matters
- Did I mention yeast health?

Making mead, as mentioned, is essentially mixing honey & water together, then pitching yeast and letting fermentation take its course. No boiling is needed (though some people do boil the must), so preparation is extremely simple. Getting the honey & water mixed together is the hardest part of "brew day". But really the difficulty comes into play once the yeast is pitched.

Yeast Health
Honey is extremely nutrient-poor, so yeast struggles to ferment the sugars. Additionally, FAN (Free Amino Nitrogen) is quite low in mead must, unlike most beer wort. Meadmakers therefore need to add a source of nitrogen in addition to other yeast nutrients. Nitrogen is typically added to must in the form of Diammonium Phosphate (DAP), which is commonly available at a homebrew retailer. Other nutrients to promote yeast growth are found in nutrient blends such as Fermaid K. It's composed of fatty amino acids, vitamins like thiamin & biotin, and various minerals. Like DAP, Fermaid-K is something you can easily buy at a homebrew supply shop.

How about the yeast itself? We typically use dried yeast from Lalvin, but have used Wyeast liquid yeast as well. I really like Lalvin 71B and D-47, but I think it's important to read through a yeast's characteristics and find one that suits your goal well. Lalvin posts all their yeast profiles online. This chart will give you a good overview of the yeast characteristics.

If you are using dry yeast, use a yeast nutrient during rehydration to assist mineral & amino acid uptake. We use Lallemand's "Go-Ferm" product which is, again, available at homebrew supply retailers.

Choice of Honey
When we first started making mead, I was picking up local honey at farmers' markets. The resulting meads were good, but not as good as the ones I was tasting at competitions. I attended a mead session at NHC last year where we tasted raw honey next to resulting mead. What that made me realize was that honeys have their own unique flavors which carry over into the final product; it helped me to understand why a lot of successful meadmakers turn to tupelo and orange blossom honeys again & again.

I found a bunch of honey suppliers online (MillersDraper Bee, Bee Folks, Northern Brewer) and ordered small containers of tupelo & orange blossom honeys from each. John and I tasted them side-by-side to determine our favorites and ordered those in bulk. I found that the Northern Brewer Orange Blossom was the best citrusy-tasting honey of our selections (we ordered 5 gallons of it), while Bee Folks had the most amazing floral Orange Blossom honey. Bee Folks' tupelo honey is wonderful and creamy and will be our choice for ordering tupelo in bulk.

Bee Folks also offers a ton of varietal honeys, many of which would be great for mead. Blueberry, almond, avocado, and even killer bee honey. I got to taste some killer bee mead at this year's Upper Mississippi Mashout and it was interesting... spicy, peppery, and not my favorite. But worth trying for sure. I can't recommend enough just buying a bunch of small containers of honey from various suppliers and finding out which ones you like best. Your mead will reflect the nuances of the honey you use, so it's incredibly important to select honey that is high quality and tastes good.

So there's your prep work and some stuff to think about. In the next post, I'll talk about actually making mead.

ShareThis